WS2812 Wifi display

maxresdefault 12

WS2812 Wifi display

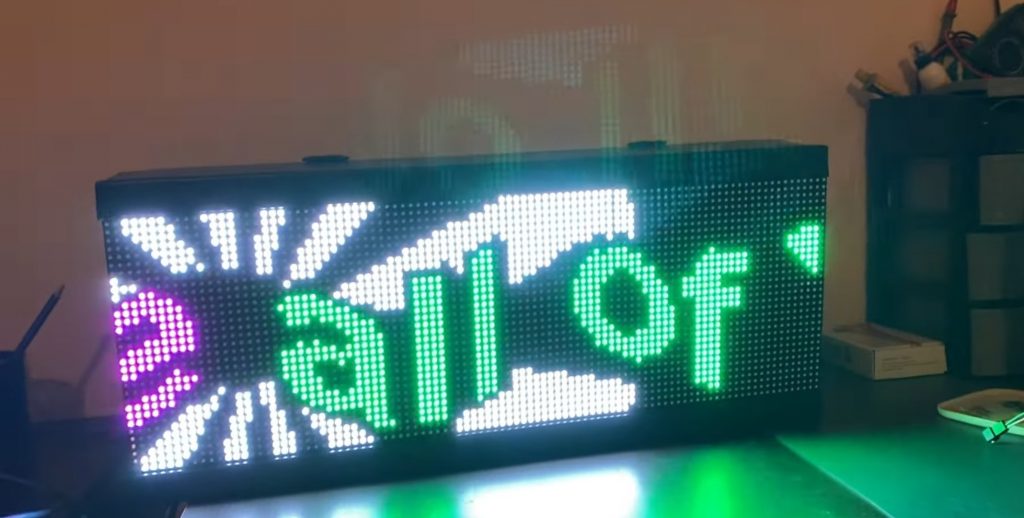
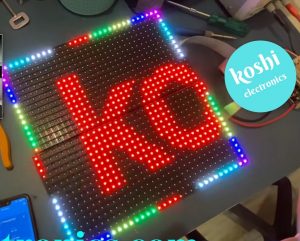
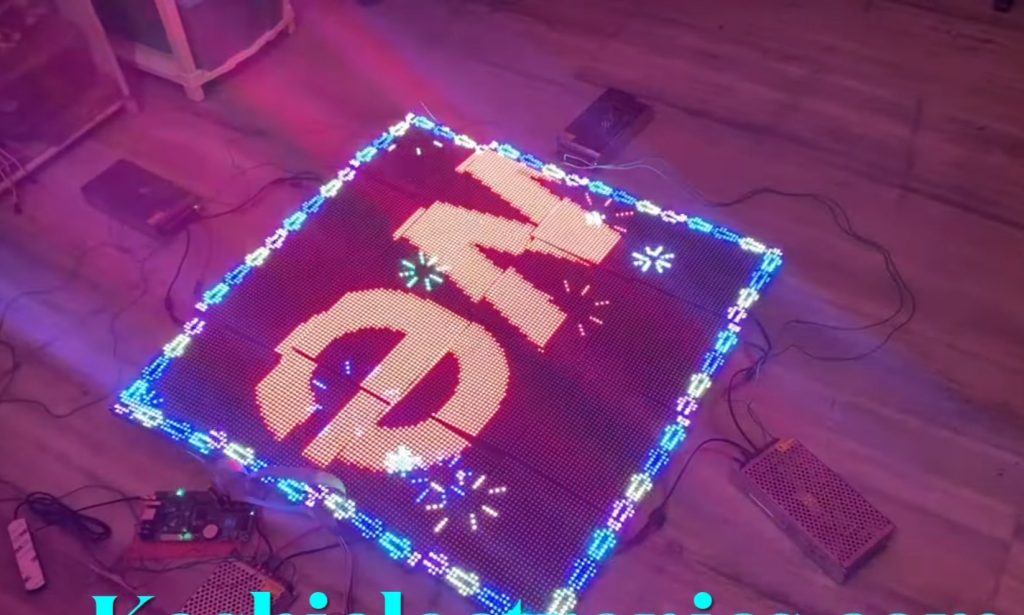
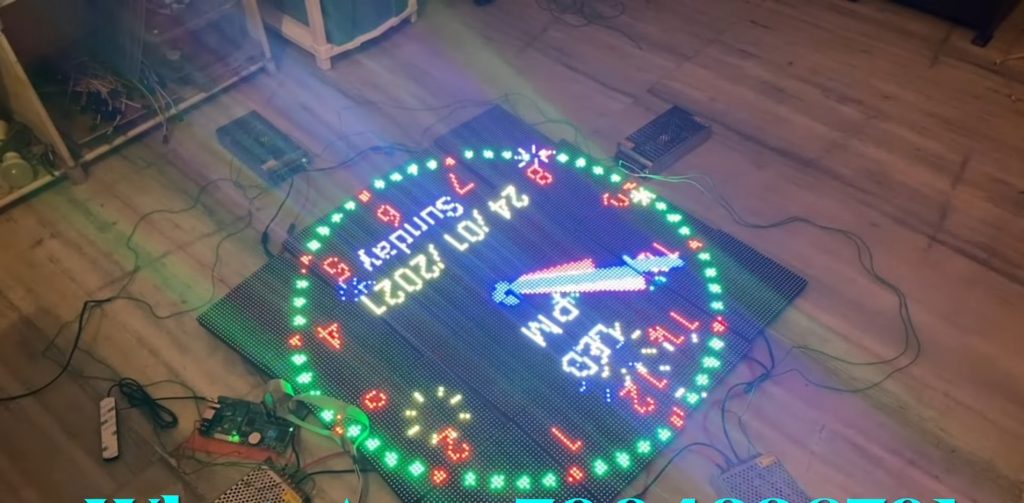
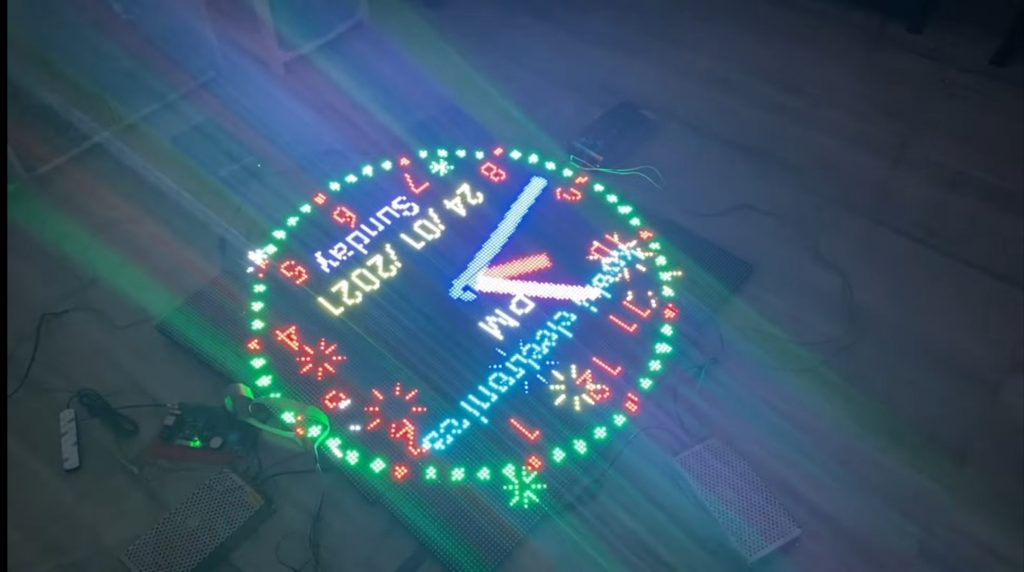
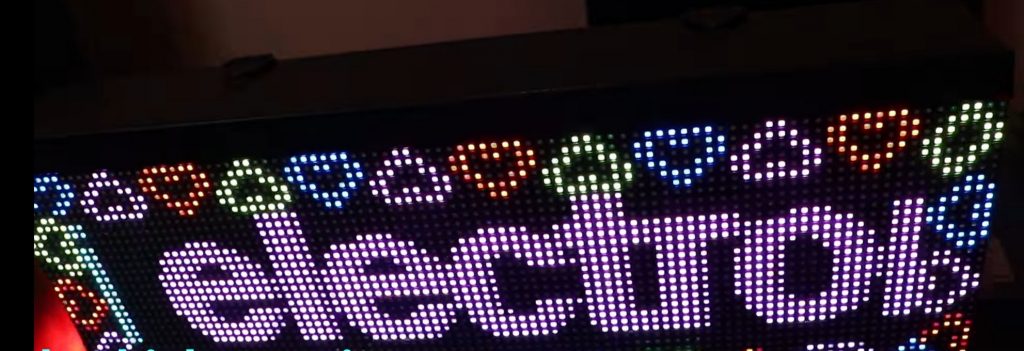
Hello, friends welcome to my blog. In this blog, we learn about how to make a wi-fi display by using a WS-2812 strip display.

Parts required:

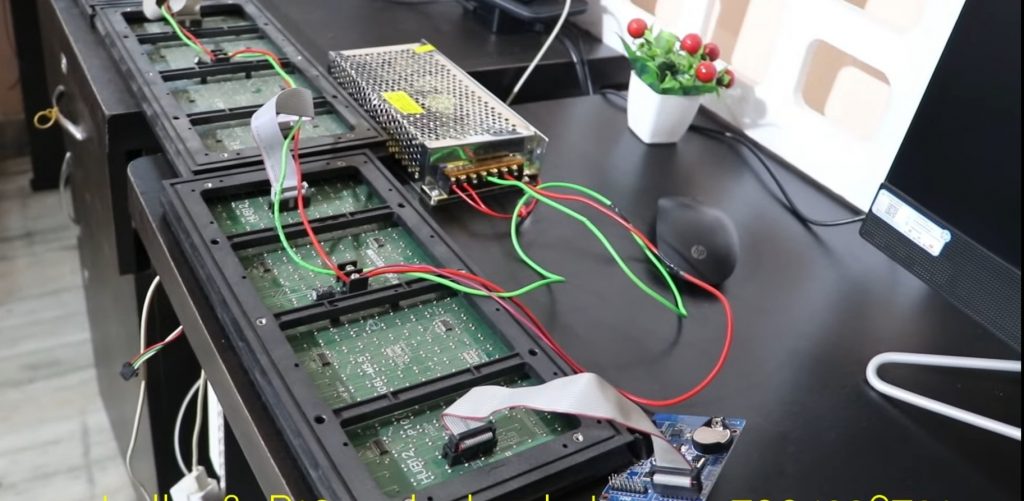
  1. Led strip 2812 https://koshielectronics.com/product/ws2812-led-strip/
  2. Pixel wi-fi controller https://koshielectronics.com/product/pixel-led-wifi-display-controller/
  3. Power supply https://koshielectronics.com/product/5-volt-20-amp-smps/

Wiring

1619441482315
(a)
1619441482310
(b)

Software : koshi Wi-fi

Steps to do:

Step1 When you buy the controller, you will get an app in the name of koshi wi-fi.
1619441482263

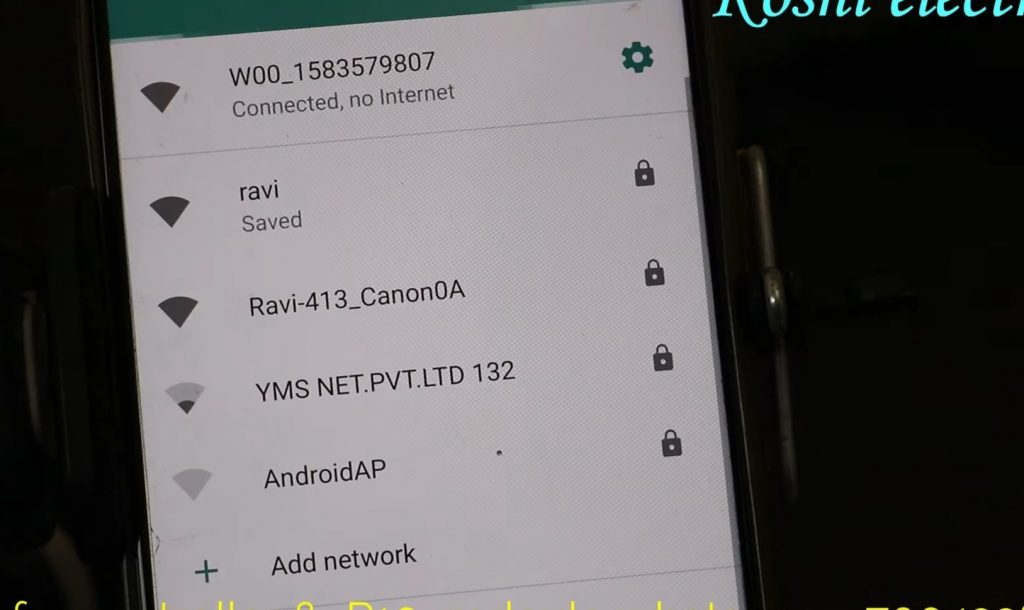
Step 2 Open the wi-fi, you will see the wi-fi name koshi connect to that. After that enter the password koshi1234 and connect to this wi-fi.

1619441482306

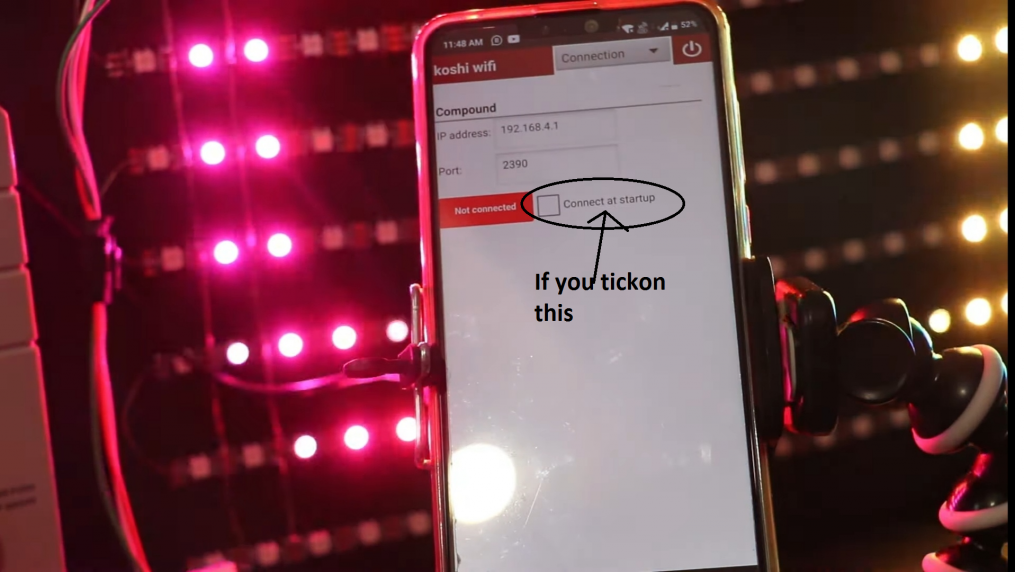
Step 3 Go to the application and click on connected.

Step 4 If you tick on the connect at start up what happened that when you close the app and after that when you next time open your app, your app will automatically connected. You don’t need to connect again.
Untitled 4

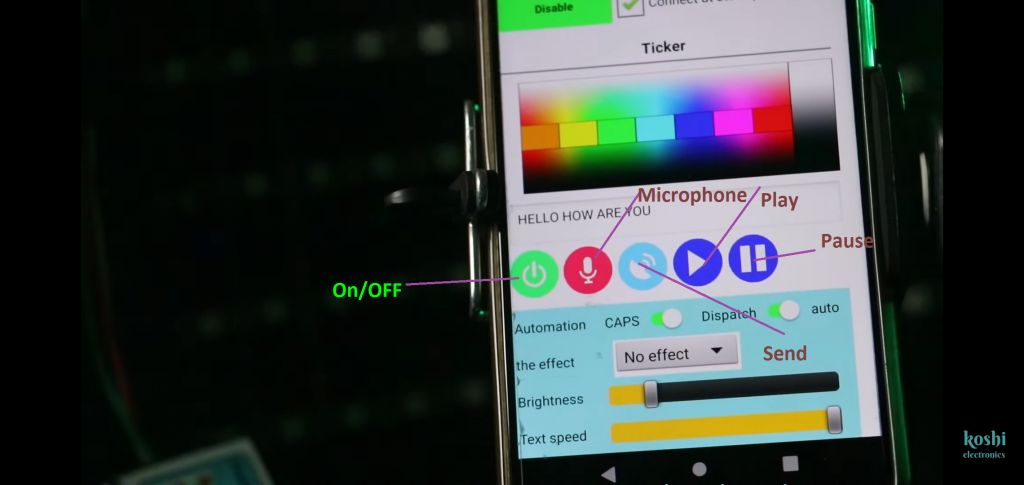
Step 5 Now lets talk about the buttons given on the app. First button which is green in colour is ON/OFF button. Through this display can be off/on.2nd button is of microphone. Whatever you speak that’s display on the screen.In this we have two features first Caps and another auto.
Untitled 4.png 1 4

Step 6 If you click on auto and speak, we see that the text is moving in small letter. When you off the auto and click on caps then speak again, we see that text on the board is moving in the capital letter. If you off the both then nothing is moving in the display untill or unless you click on send button which is blue in colour. When you not click on that button the text which you enter previously that text is running on the board continuously.

Untitled.png 3

Step 7 Now you see the next features which is Brightness, Text speed and Effect change.You can set all these according to you as you want.

Untitled.png 4

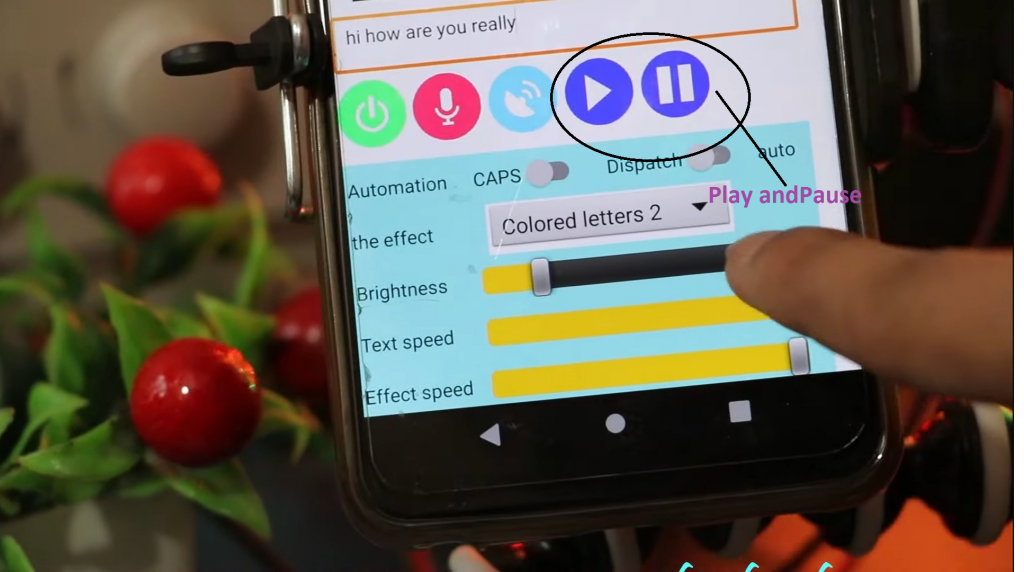
Step 8 Next button is play and pause button. If you enter the text and want to stop it then click on pause button. Here we have six colour according to you, you can set the effect.
Untitled.png 5

Step 9 At the top right of the screen we see the power button, through this we can exist from the screen .Another option is of clock .If you want to run the clock firstly clear the text. For this what you have to do is select text option ,clear the text screen and then click on send. We see that on the screen timer is running. You can also pause the timer by clicking on pause button.

Untitled.png6
(a)
WS2812 Wifi display
(b)

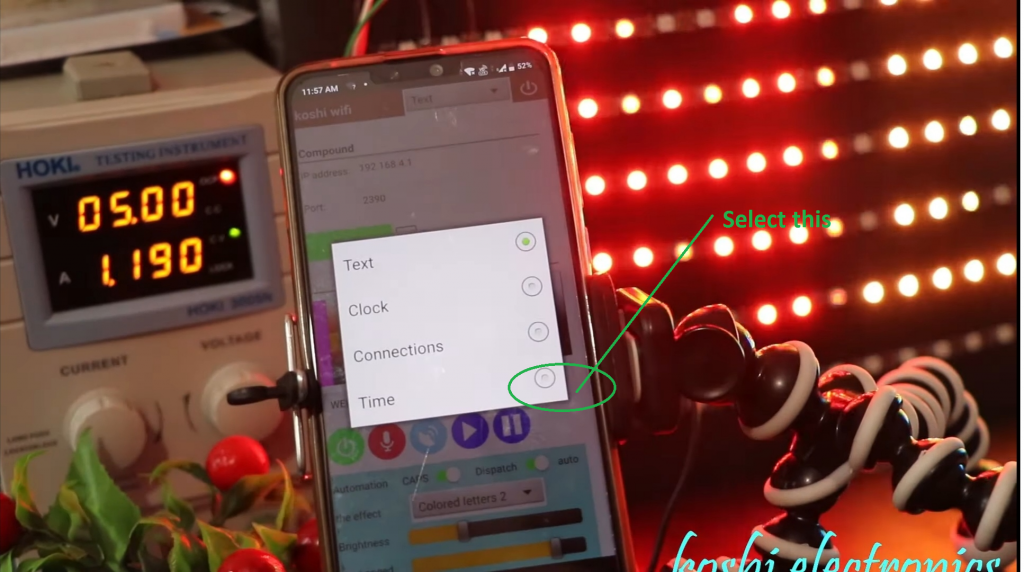
Step 10 Next is the time option. If you want to ON/OFF the display you can set the time. In mode1 you can set the time according to you and click on turn off and in mode 2 again set the time and click on turn on then click on save. As you have seen that the time which you set according to that function will perform.

1619441482290
(a)
Untitled 1.png6 1

video tutorial -WS2812 Wifi display

How to program led badge display

maxresdefault 10

Hello, friends welcome to my blog. In this blog, we learn about

How to program led badge display


Parts required:

  1. Led badge – https://amzn.to/3boY4gb

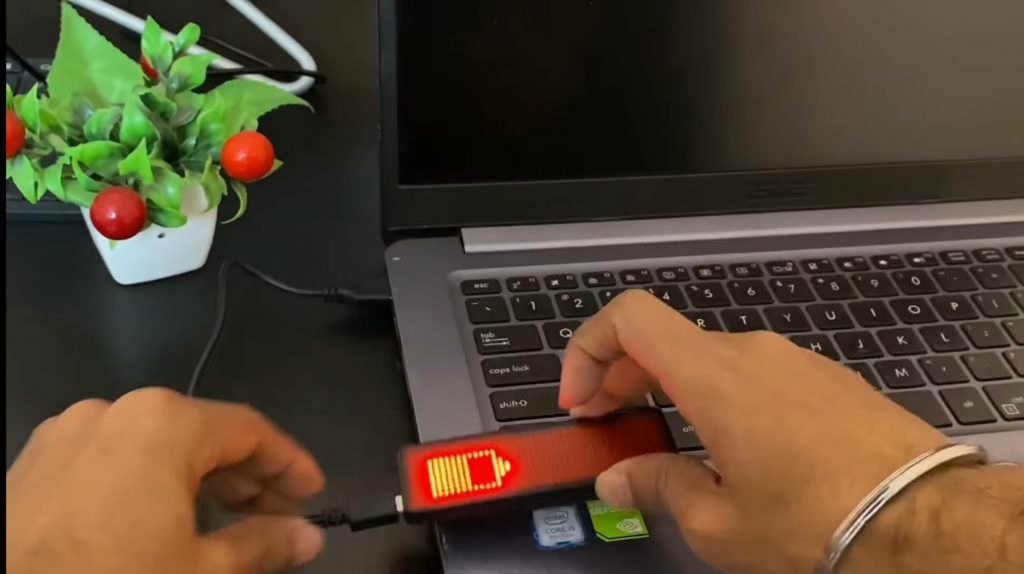
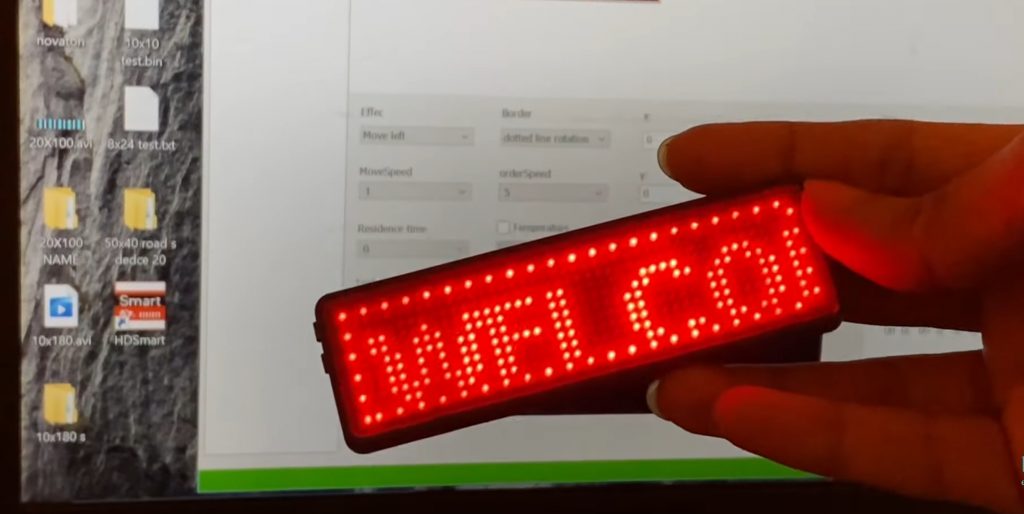
About led badge display: In this display, we have two buttons. A symbol is given in front of each button so that we will know which button will be used for what purpose. When we press the power button for some time the display is on first we see the battery symbol after that text is displayed which we have fed on. When we press on the setting icon the brightness has been changed.

Untitled 3

Use: Led badge display is used on marriages, parties, etc. so that we can be able to identify each service separately.

Steps to program led badge display :

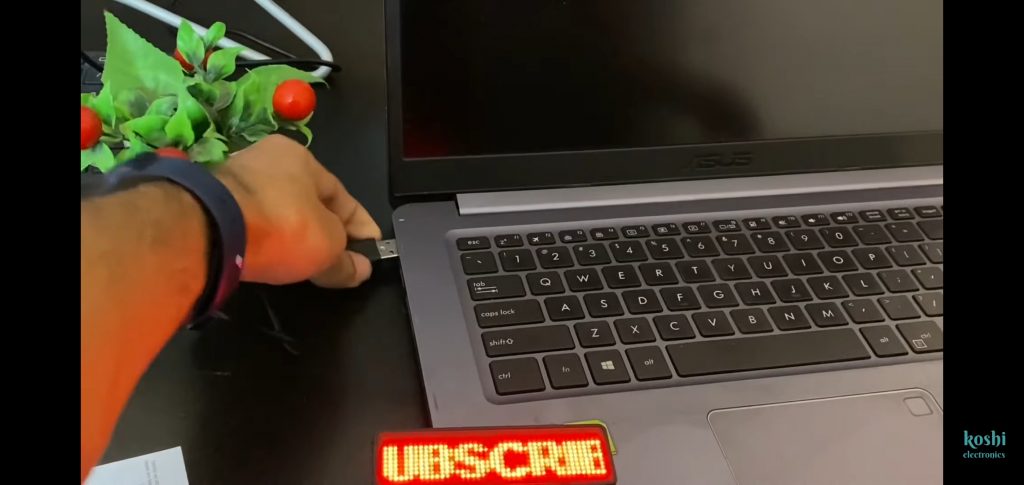
step 1 Firstly connect the cable to the laptop or computer. After that connect the device to another side of the cable.

1619426735263
(a)
1619426735229
(b)

Step 2 When you connect the USB that goes to my computer. Here we see the USB folder click on that here we see HD Smart V3.9.exe software name click on that and install it.

Screenshot 2021 04 26 14 34 10 191 com.google.android.youtube

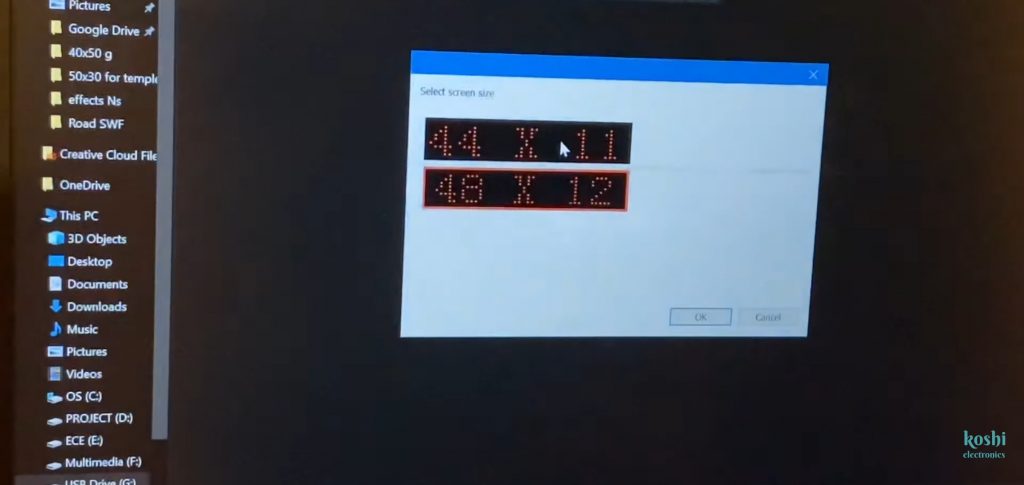
Step 3 After installation they said that select screen size. According to your display select this. On the cover, the display size is also mentioned you can see it there also.

1619426735259 1

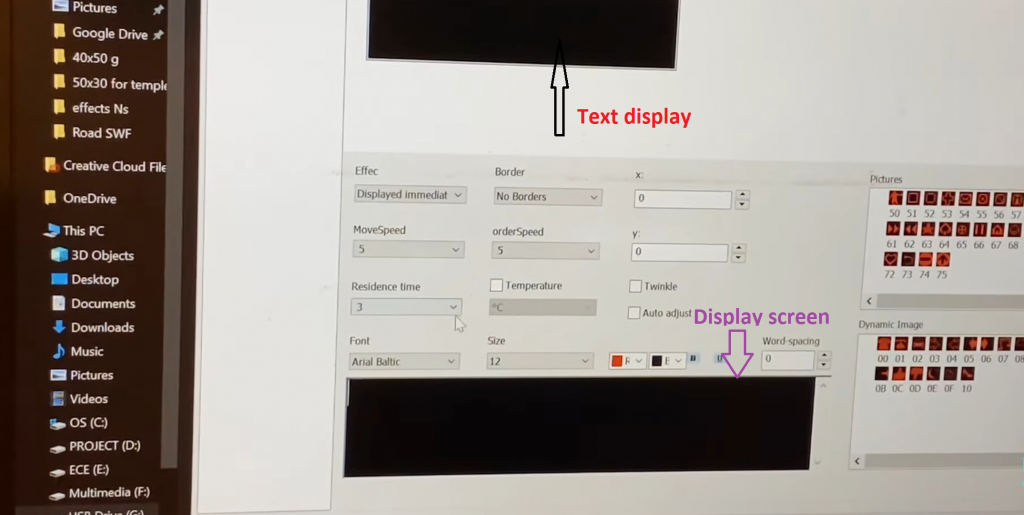
Step 4 After that we see the two displays one for the text and another in which text is the display.

Untitled 2.png 1 2

Step 5 Now we enter the text on text display. Here you can set the speed of text, effect, bold the text, set the border, etc. according to your need. After that click on send. We see that text is moving on it. After that remove the display from the USB. Press on the power button of the led badge display we can see that text is moving on it.

1619426735252
(a)
How to program led badge display
led badge
(b)

Step 6 You can also show the image on the board by click on the image given on the right side of the screen.

2

Video -How to program led badge display

program novaton N76003 IC from Nulink

maxresdefault 8

Hello, friends welcome to my blog. In this blog, we learn about

how to program novaton N76003 IC from Nulink  programmer

Parts required:
  1. NU LINK PRO
  2. N76003 that we see the pixel controller
  3. The cable which is given
  4. Power supply

Software: Novaton Nu Micro Programming tool 3.00

Steps to be followed:

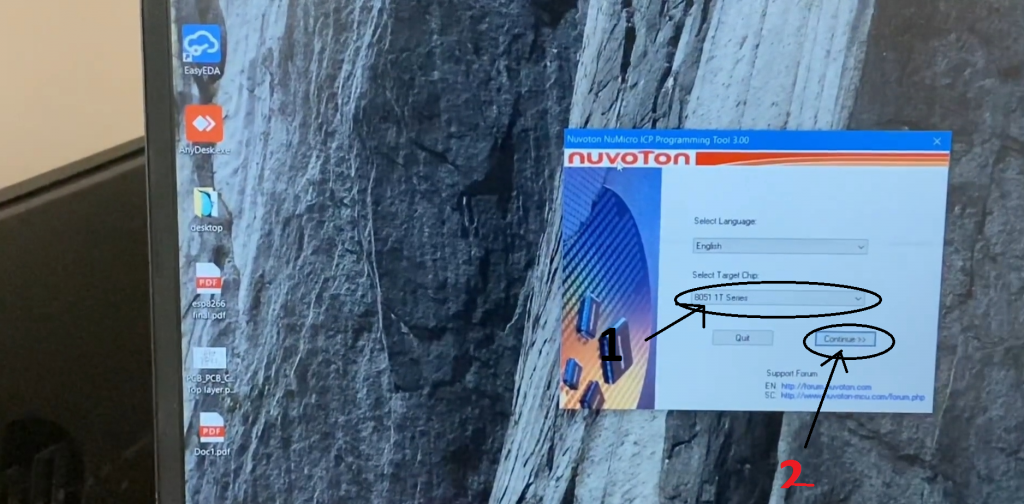
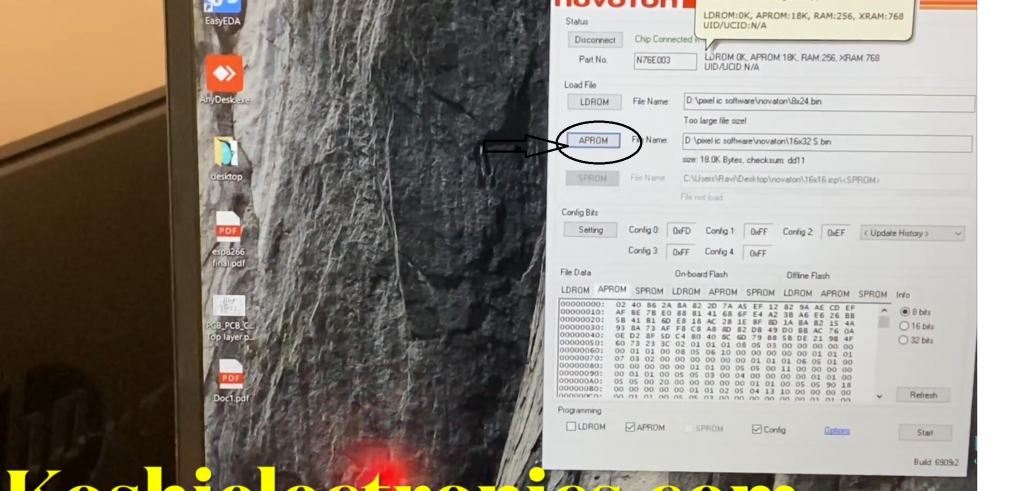
Step 1 Before opening the novaton software, we will connect the programmer to our laptop or computer with the help of a cable. After that, we will open the software. In the select target chip, we will select 8051 1T Series then click on continue.

1619416718747
(A)
Untitled 2

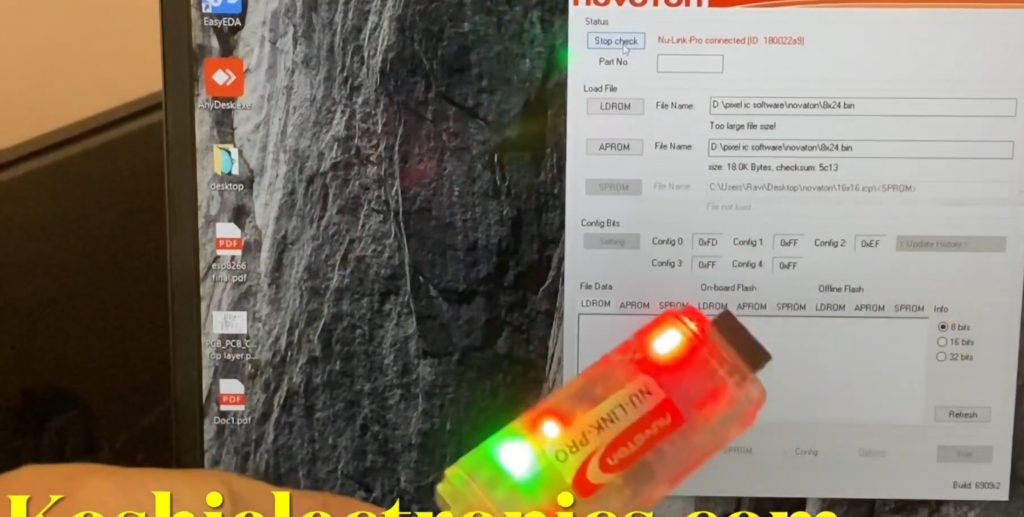
Step 2 After this we see the connect option. As soon as you click on connect, the led in the programmer will start blinking. Having a led blink means that the program starts searching for which IC is.

program novaton N76003 IC from Nulink

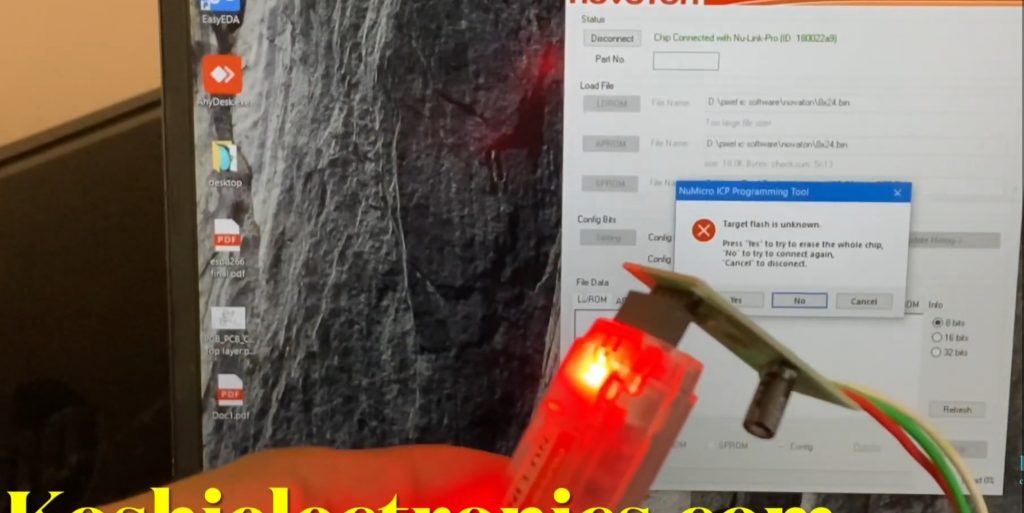
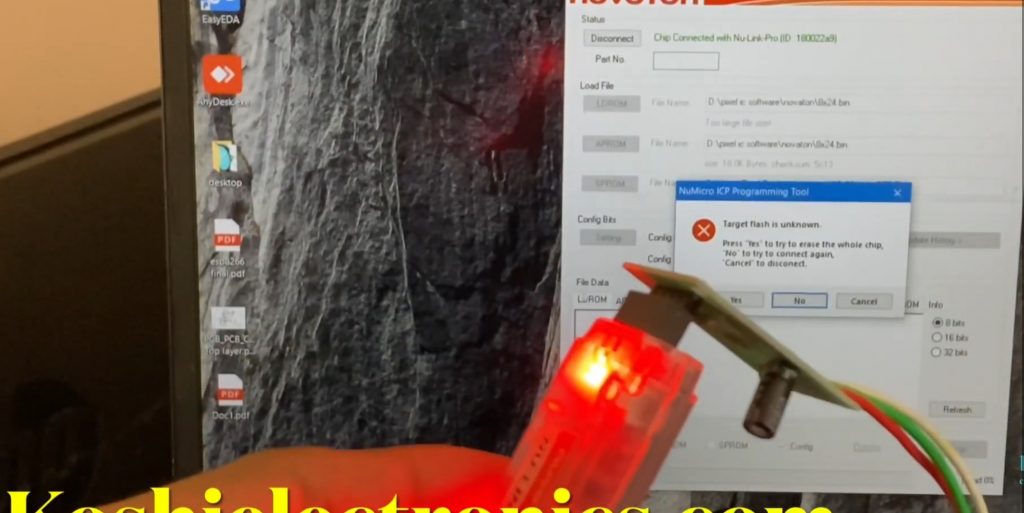
Step 3 As soon as you connect the programmer to the controller. In the box, we will see the IC number. There will be some errors shown which will be due to some reasons. Sometimes happens the controller does not work properly due to poor soldering. In that case, we change the controller and use another.

1619416718735

Step 4 After replacing the controller we see that the IC number is shown in box.

Untitled 1.png 1 1

Step 5 Now whatever file is generated from our software, we have to open that file through APROM. Here we select the hex file of 16*32 S bin which we already have.

Untitled 1.png 2 1
(A)
1619416718751 1
(B)

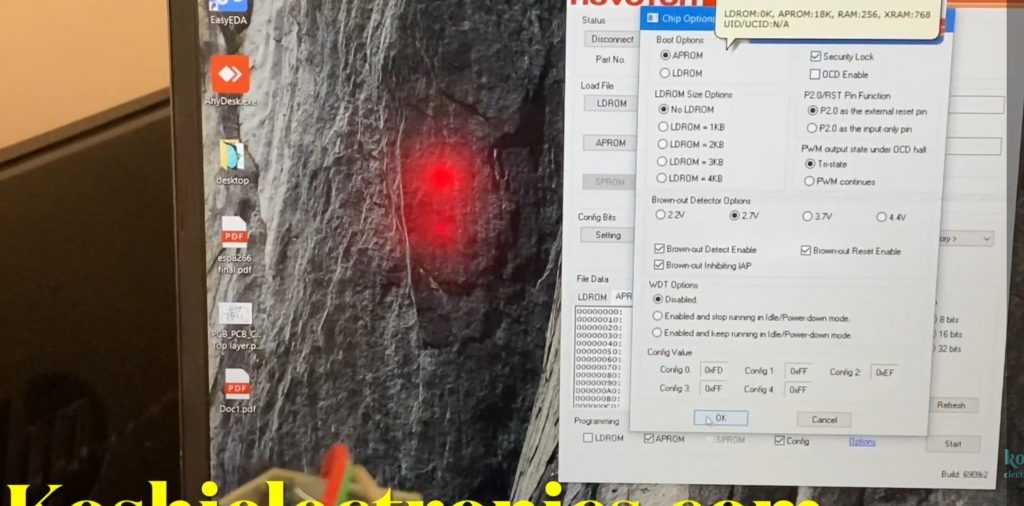
Step 6 As we are done all things properly then go to settings, we select security lock nothing else will be changed. Then click OK.

1619416718754 1

Step 7 Then go to start, we see that green color line is going on. If this not happened that means there is no proper soldering on your controller and we see the errors coming on the screen. If we have proper soldering on our controller, then our program will be upload successfully.

1619416718735 1

Step 8 Now what we have to do next is to check this controller on the 16*32 board whether we are getting output in it or not.

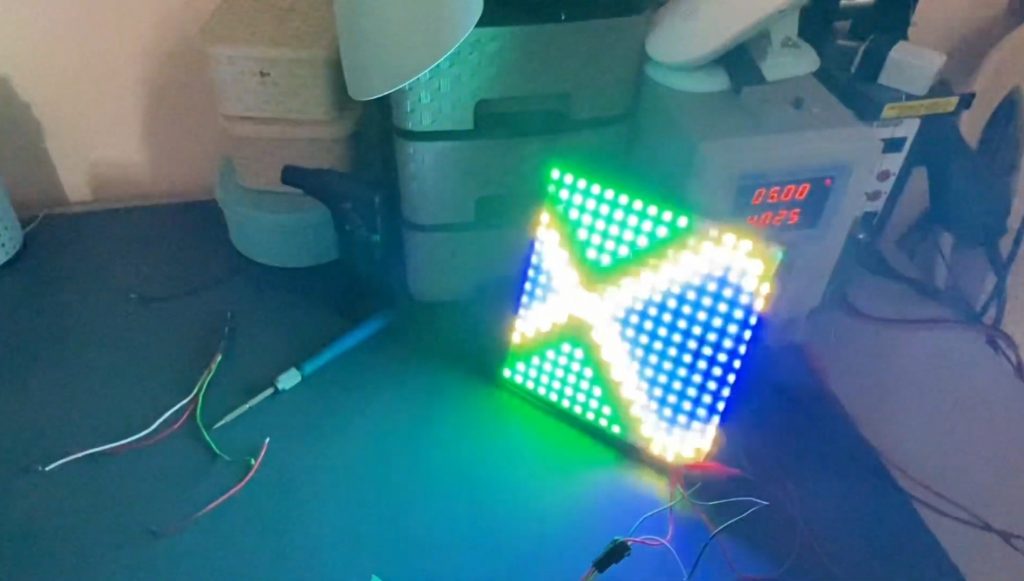
Step 9 We gave power to the lab bench power supply, 5V supply is already set on this. Then we connect the positive terminal to the positive wire and negative to the negative wire. After that we plug in the controller, we hear some noise because it is loaded. We see that the program is running on the board.

1619417060796

Video - program novaton N76003 IC from Nulink

Led edit class not register problem 2021

hqdefault 6

Hello, friends welcome to my blog. In this blog, we learn about how to solve the problem that led edit class not register

Problem: People who have updated their computer or laptop, then the problem is coming with them that their LED edit 2014 is not running and there it is written that the class is not registered. Why did this happen because of the new adobe flash player that came in the window his data has been deleted?

Steps to solve this problem :

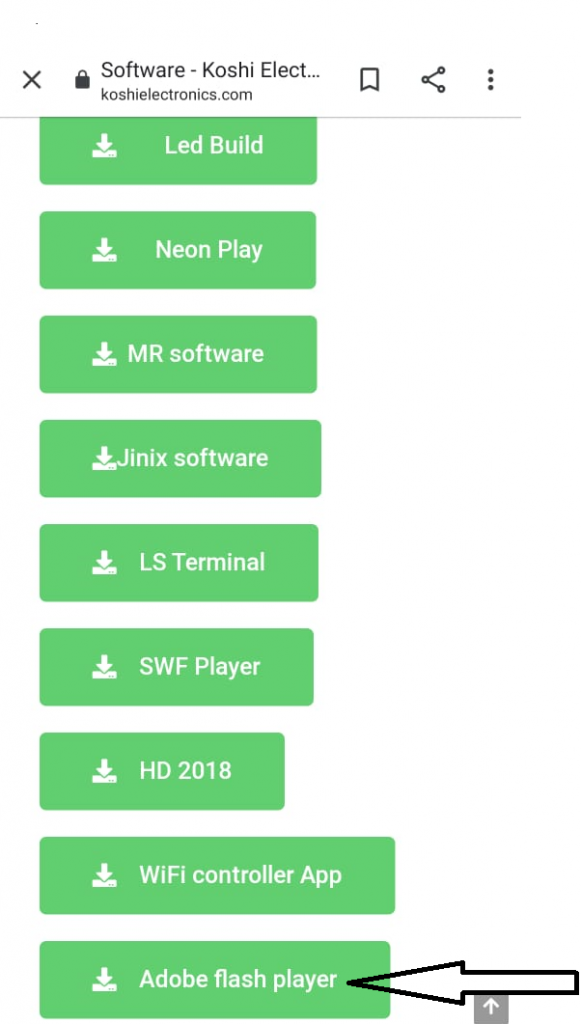
Step 1 Search koshielectronic.com in google. After that go to the software section then click on adobe flash player and download it.

1619265876300
(a)
Led edit class not register
(b)

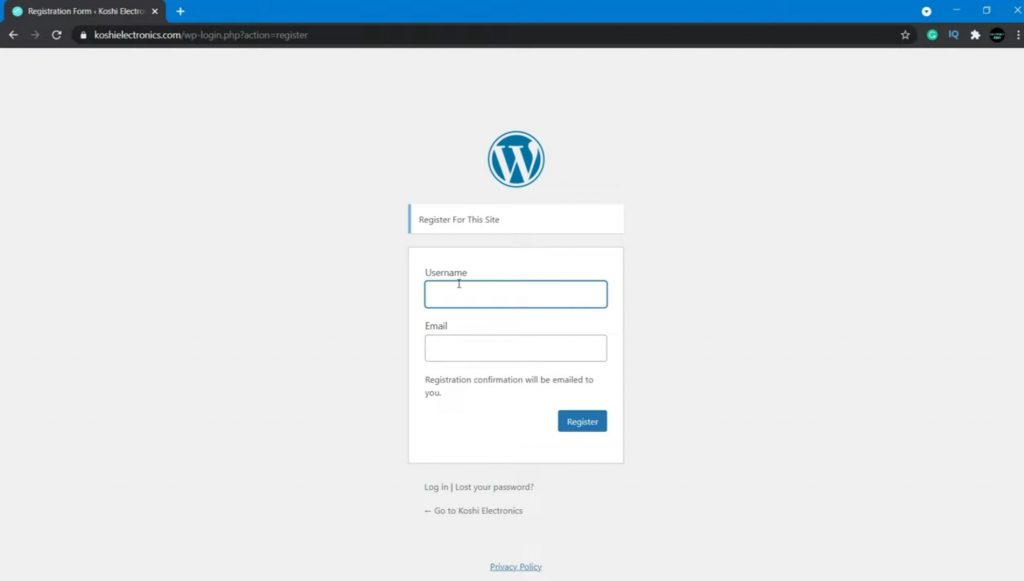
Step 2 If you are not on our site, then you have to be registered on the site before downloading. So what you have to do is click on register, after that, you have to enter your username and email id then click on register. Login details will be given on your registered email id by which you can log in. You can also change the password according to you. Then go to the software and download it.

1619264955309

Step 3 After completion of download you can run the setup, then icon is created on desktop. After that right click on icon and click on extract here.

1619264955317

Step 4 After extracting two software are created on the screen. First, download first software. After installing this click on the second software to install.

Untitled.png 2

Step 5 After that open the control panel click on uninstall a program. We see the adobe flash player name on it After this, when you open Led edit 2014 then adobe flash player will on, and in Led edit, all effects are run properly.
Untitled.png 1
(a)
1619264955332
(b)

video Tutorial – Led edit class not register

HD 2018 software

HD 2018 software

Hello friends welcome to my blog. In this blog we learn about How to use HD 2018 software for programming P6,P8,P10 display module.

Software : HD 2018

How to download HD 2018 software :

To download HD 2018 software, first of all, you will open Google, after that, you have to search koshielectronic.com, after that go to the software section, we see the software name HD 2018. Click on that and download this software.

1619255544537
Steps how to make animation on HD 2018 software:

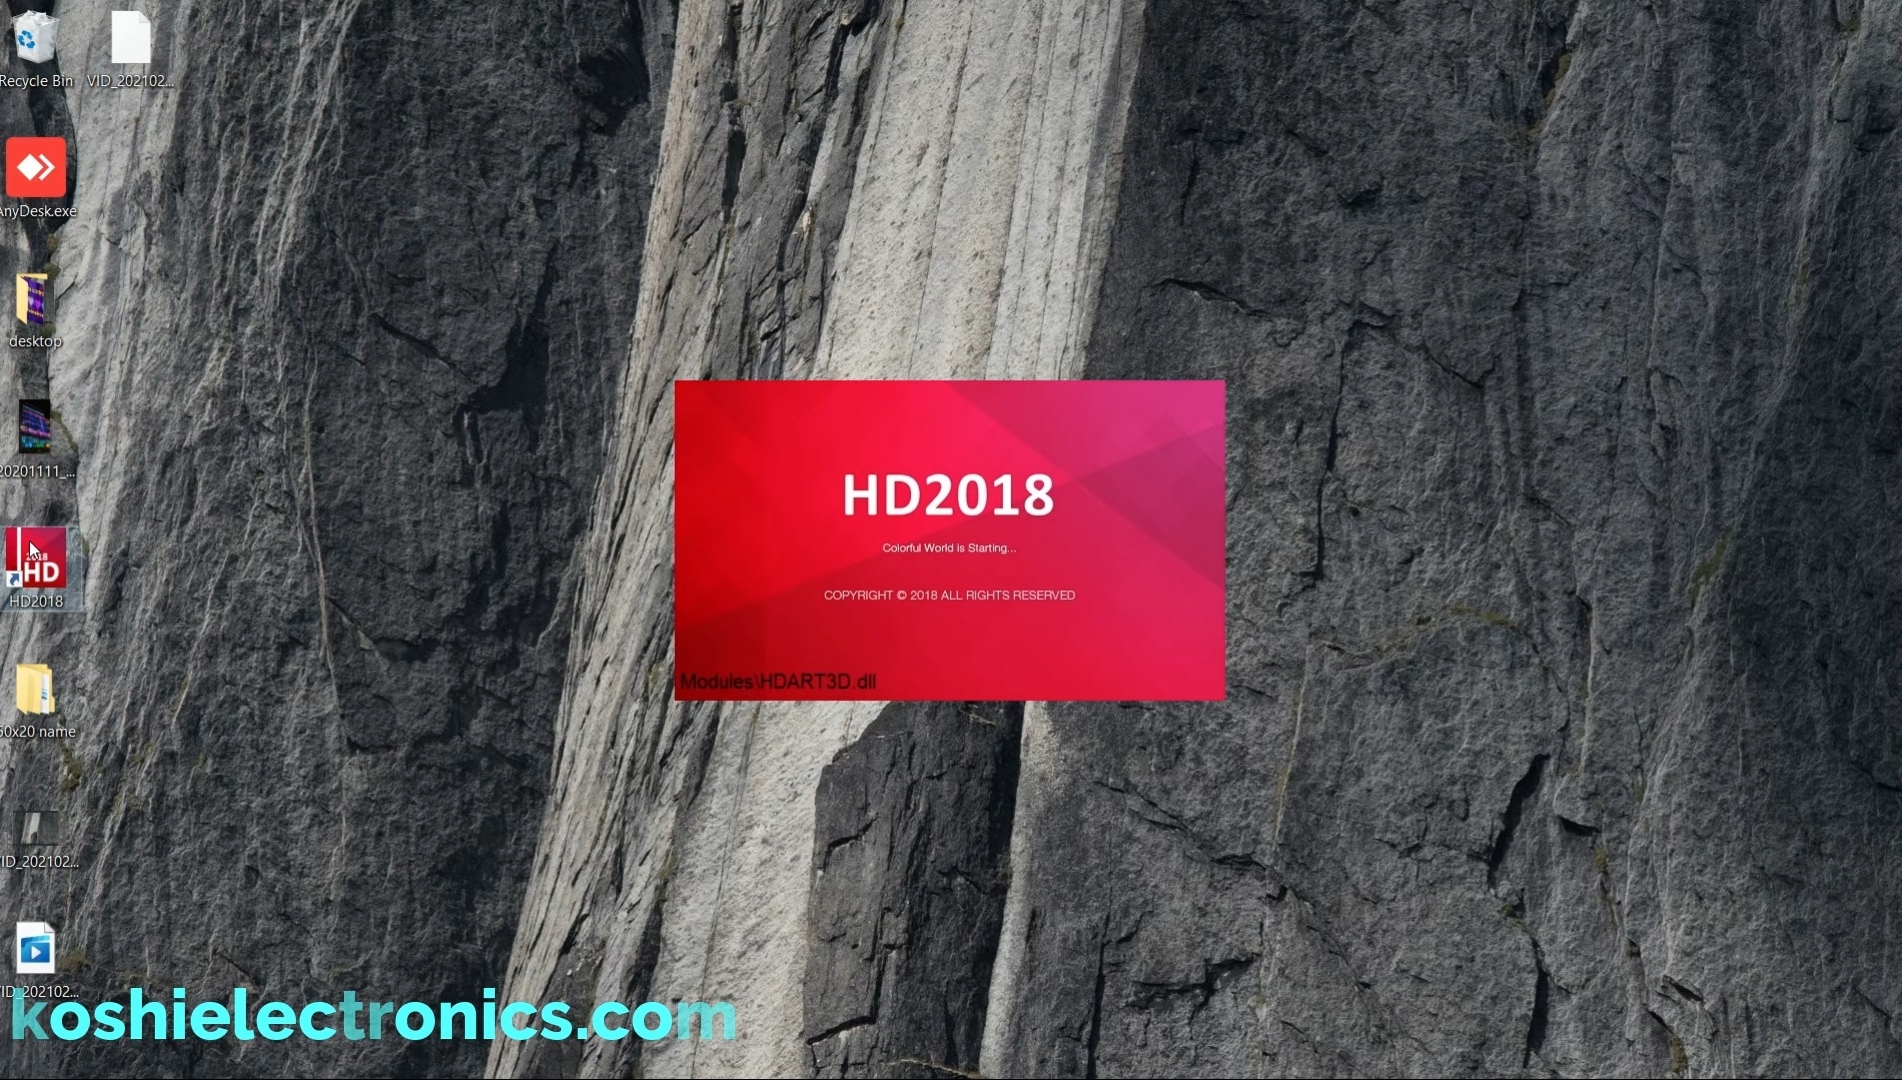
Step 1 Open the HD 2018 software

HD 2018 software

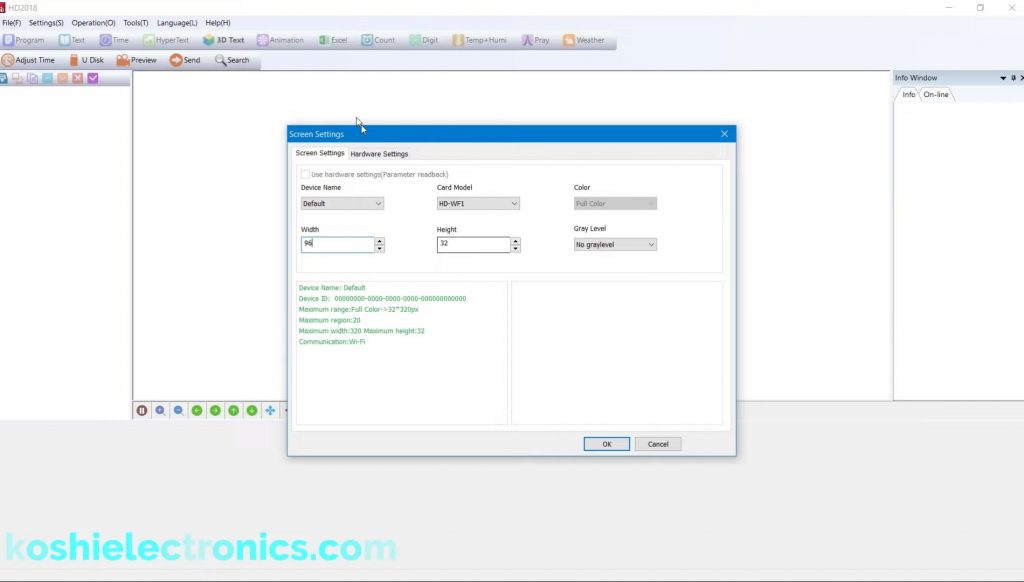
Step 2 Go to file then new screen and then enter the password ie…888 then click Ok .

1619255544547

Step 3 Next screen will be open, what is there will ask us the card name, then the card name is HD-WF1 which is used for RGB tile. The total P6 tile used is 3. In one title there is a 32*32 matrix. Than 32*3=96.In height, we have 32 leds.

1619255873832

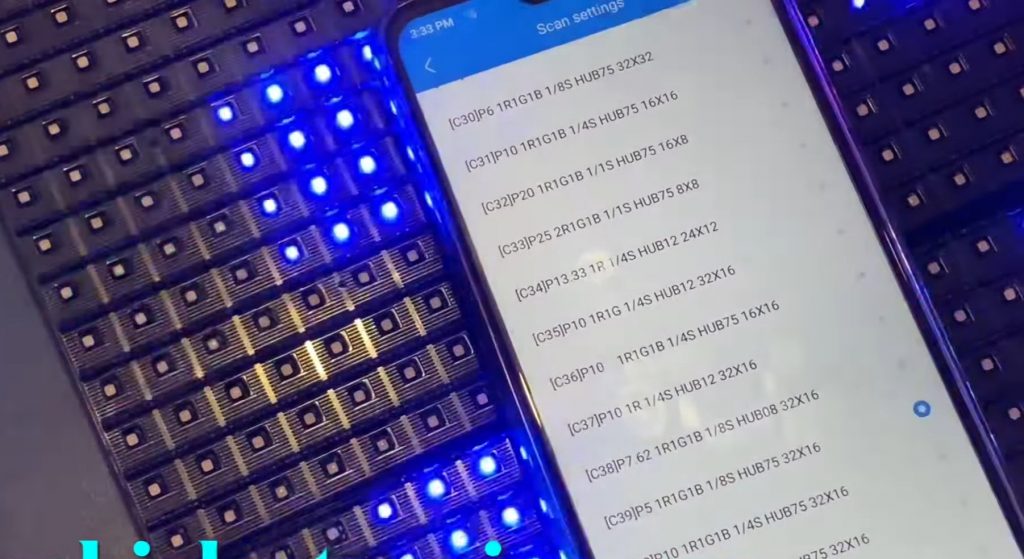
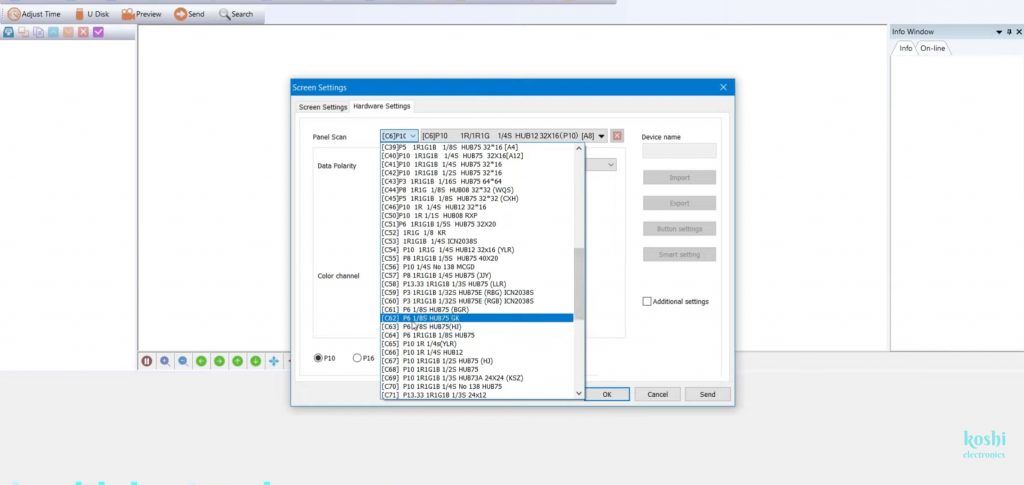
Step 4 There is another setting Hardware Setting. In panel scan, you can select the IC number. Wherever you buy this tile, you will ask from there what IC it is used in. After that select the IC number. Our tile which we used is [C62] P6 1/8S HUB75 GK. If you don’t know then one by one apply for the number according to your tile. The number that matched that is your IC number.

1619254659322 1

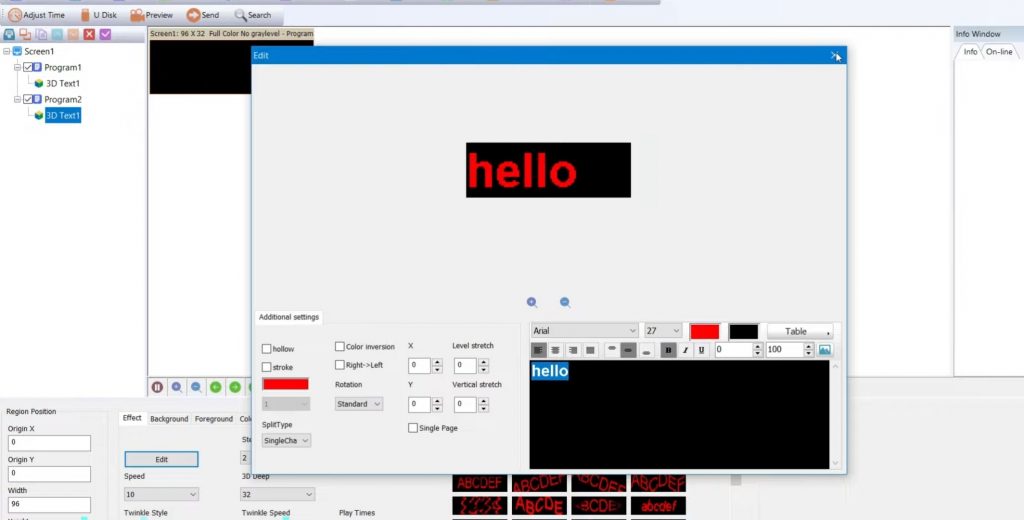
Step 5 Now next screen is open. Here we want to run 3d text .On the screen we see the 3D text option press enter. After that it shows a region on the screen. Our text will go as far as pulling region.

1619254659339

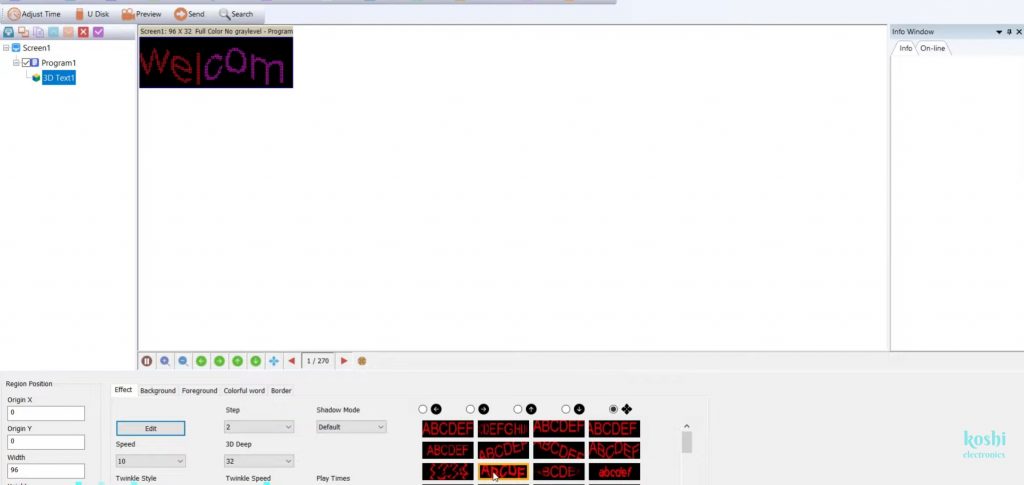
Step 6 At the bottom of the screen we see different options like effects, background etc. Another option are also there like zoom in, zoom out, left ,right, up, down etc , you can apply any of these according to your choice.

1 1

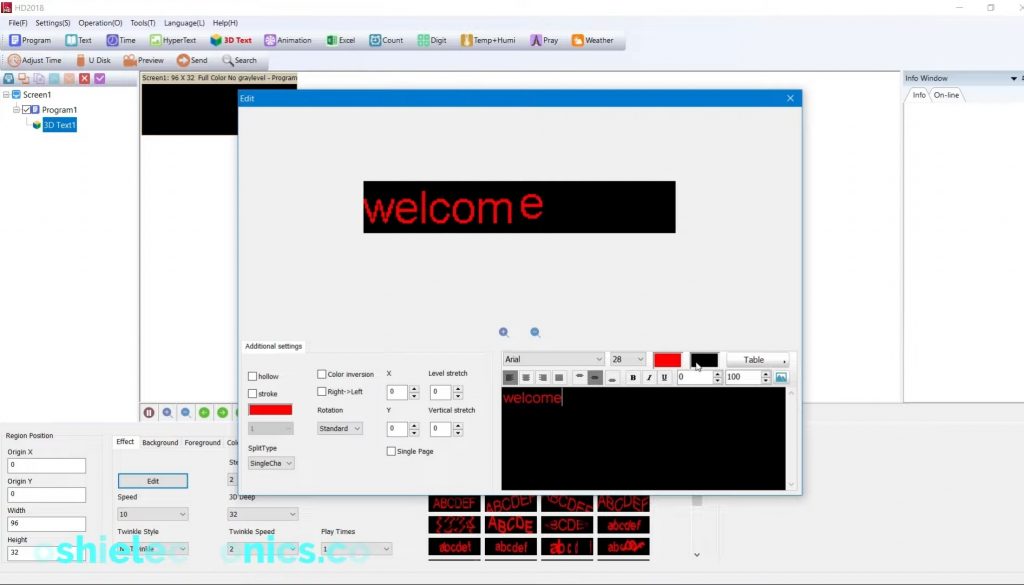
Step 7 Now we enter the text ,first we press on edit option .After that set the width and length and also select the colour whose text you want to play, then write the text.

1619257555797

Step 8 We see some arrows like left, right, up, down. When we click on that the text is running accordingly. When we go to the movement side when we click on that text is moving accordingly. We can also bold the text and maintain the speed of text and so many things can be changed so you can make changes according to you.

1619257555810

Step 9 Now make next program click on 3D,then go to edit,then write the text.You can bold the text and change the font size according to you .

1619254659289 1

Step 10 You can also set the background of your text .Go to background option then select background your choice

1619257555789

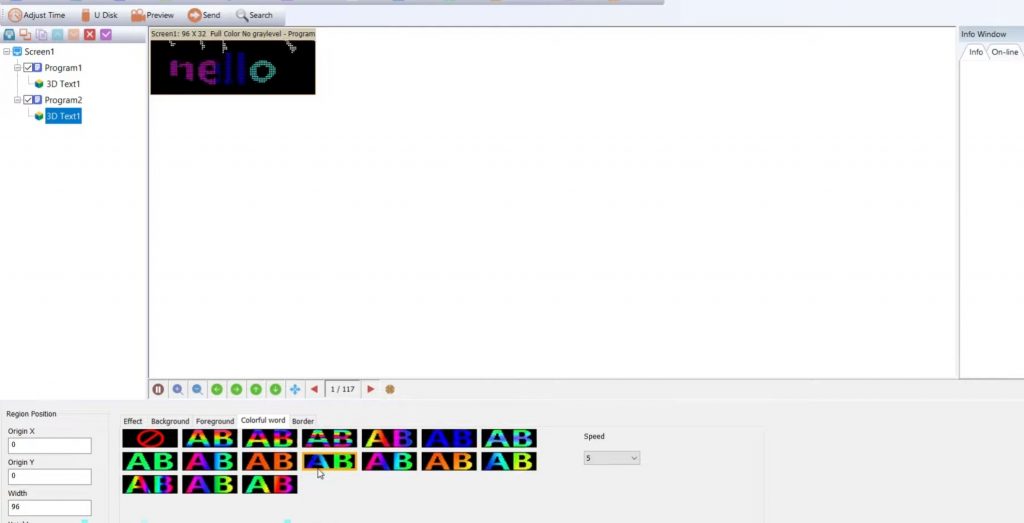
Step 11 To show colourfull words go to colourfull word option select any of them which you want.

1619254659292 1

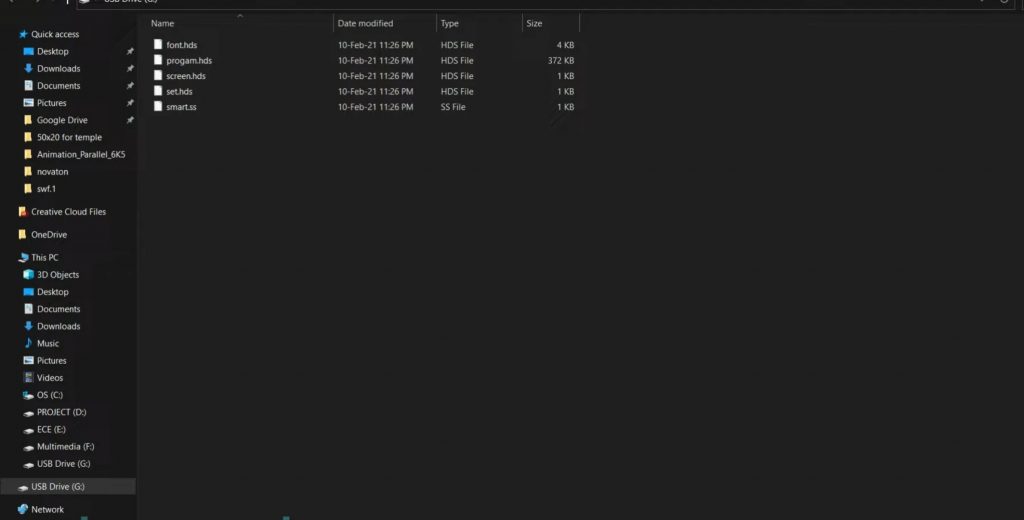
Step 12 Now we take the output so what we have to do is connect the pen drive to the computer. After that format the card. Now we see the U-disk option. In U-disk we see the file size. Now we see the removal disk option we export this.

1619254659301 2

Step 13 After export the file the two program which we made are on the pen drive.

Step 14 In pen drive folder we see the different files. Now we connect this to display.

1619254659308

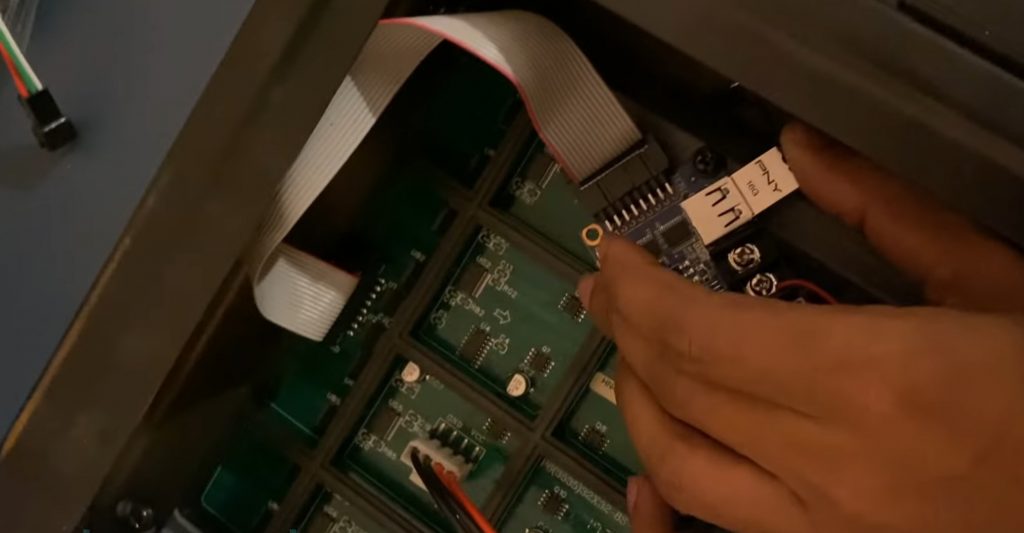
Step 15 Now we connect pendrive to display.You can also program through computer.

1619254659314

Step 16 Now power the display. On the screen, we see USB which means data is uploading. After that data is running on the display that means we select the correct IC number.

1619257555805 1

Double line RGB display from wf2 controller

maxresdefault 7

Hello, friends welcome to my blog. In this blog, we learn about how to make 2 line RGB P10 display from the wf2 controller.

How to make 2 line RGB P10 display from WF2 controller


Parts required :

  1. P 10 RGB Tile  https://koshielectronics.com/product/p10-rgb-led-module/ 
  2. Power supply https://koshielectronics.com/product/5-volt-20-amp-smps/
  3. wf2 controller. https://koshielectronics.com/product/p10-display-controller/

Wiring :

1619174706606

Software : HD 2018 Or android app 

download – App

This image has an empty alt attribute; its file name is 1618995706827-233x300-1.jpg

Steps to be followed :

Step 1 Turn on the power supply.

Step 2 Now turn off the mobile data then go to the wi-fi. Connect the device to wi-fi. Wi-fi name is WF2_172e5cb87057.In case this name is not shown what you have to do is to turn off the supply for a while and then on the supply. With this, our wi-fi name is going to be a show. After that enter the password ie..88888888 then, click on connect.We see that wi-fi is connected.

1619174282909

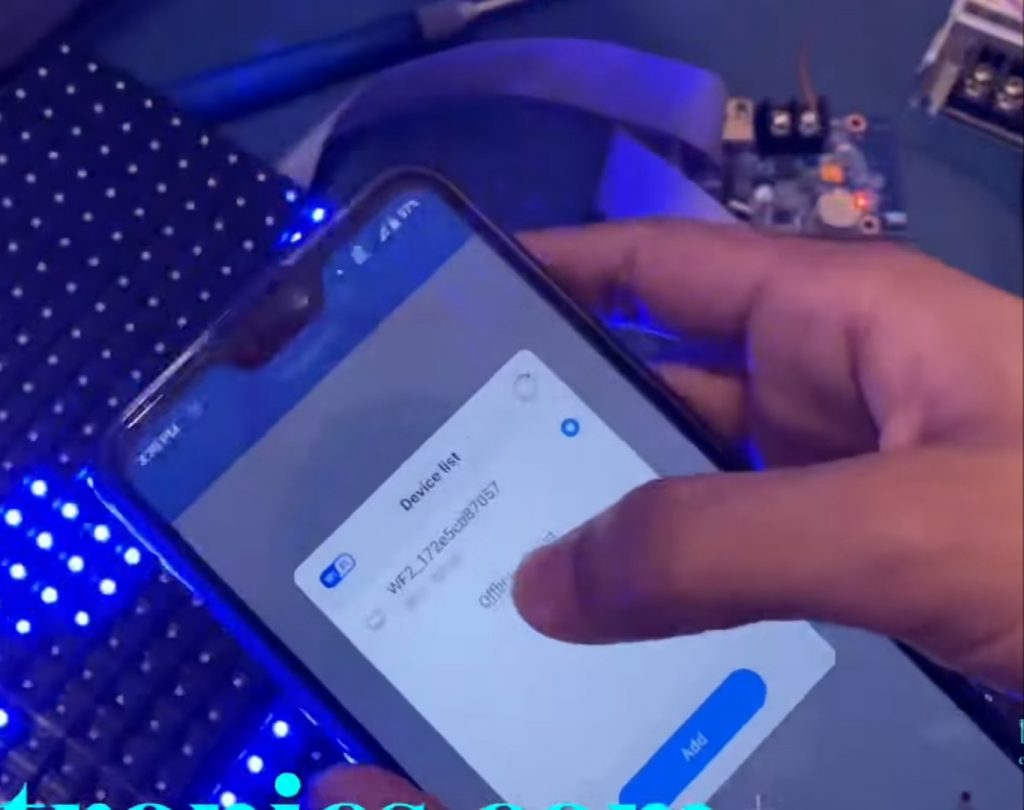
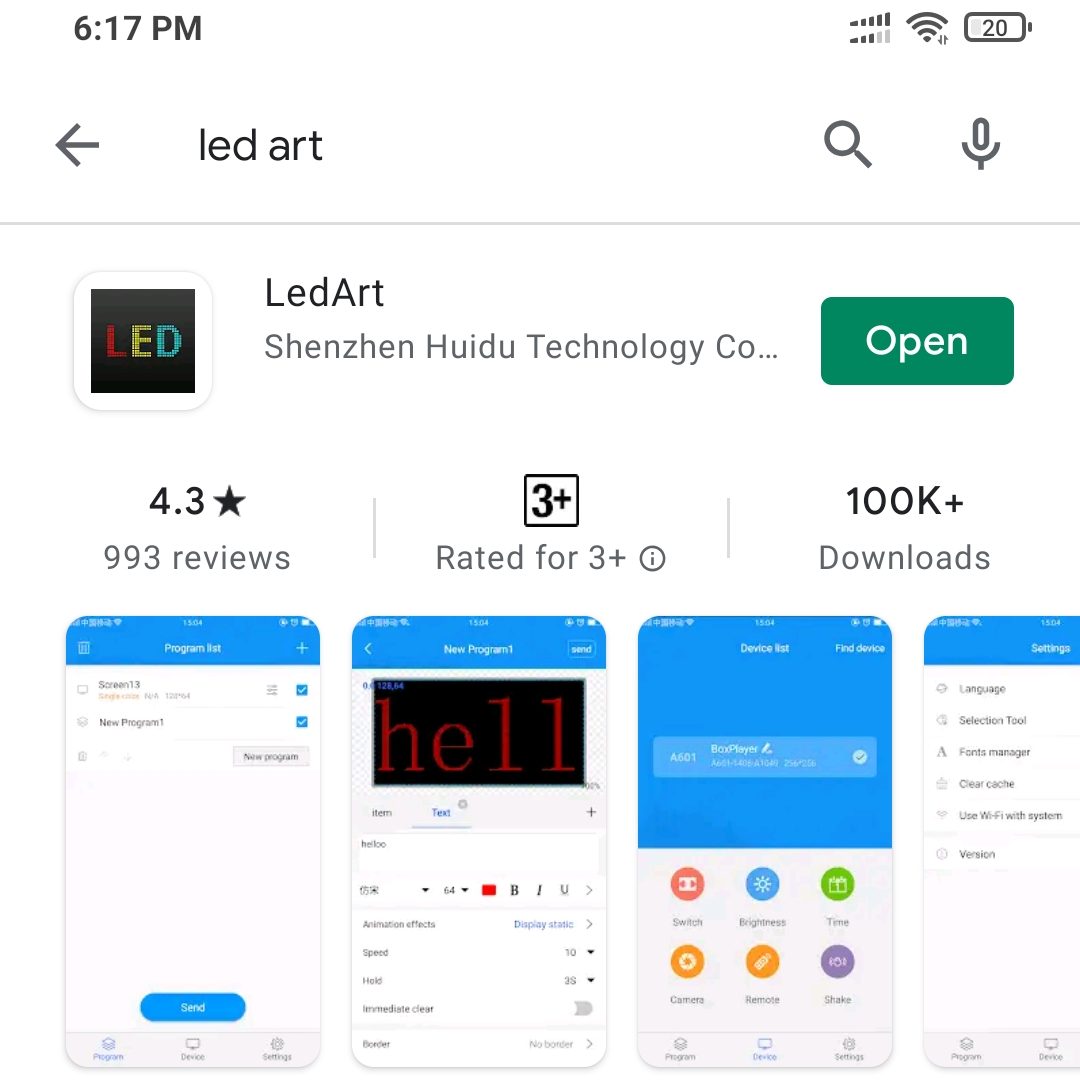
Step 3 Open the Led Art app. After that create a display. On the screen, we see the card name WF2_172e5cb87057, then press on add button.

1619175175145

Step 4 After that make the settings, we have 2 tiles. Select RGB P10 display width 32, height 32, device name W series, etc. you can select accordingly then press OK.

1619174282886

Step 5 Next screen is open. Here we enter the text whatever you want to display on the board. You can write text in a colorful way also. For this, you have to select the text then click on the color which you want. You can also change the font size of text, speed of text, etc. whatever you want to change. After that click on the send button.

1619174282897

Step 6 On the RGB P10 display text is running upside down. To solve this problem you have to select the correct IC number of the RGB P10 display board.

1619174282900

Step 7 To solve this problem you can go to the first device then click on hardware. After that enter password ie..888. The next screen is open. Here you can select C39 which is the P10 number. After select this press on manual configuration. If the device show disconnected you have to reconnect again with the same procedure as mentioned in step 2.

1619174282906

Step 8 After reconnected press on manual. As soon as our IC matches perfectly we see that on RGB P10 display text moving properly.

1619174282902 1

Video Tutorial - wf2 controller

P6 full-color display using D15 huidu card

P6 full-color display using D15 huidu card

Hello, friends welcome to my blog. In this blog, we learn about P6 full-color display using D15 huidu card D15 card come with different features you upload program through a different medium ( using a mobile app, using Pendrive,or with the help of a laptop ) in this article we learn how we program through an android app you run text, video, gif file and set clock through you android app this controller is made huidu which is a well-known company for making RBG display professional controller

Parts required:

  1. P6 tiles https://amzn.to/33j63Hd
  2. D15 huidu card controller https://koshielectronics.com/product/huidu-hd-d15-full-color-controller/
  3. Power supplies https://amzn.to/2PTcDAU

Software for P6 full-color display using D15 huidu card

download – App

Wiring :

P6 full-color display using D15 huidu card

Steps to be followed: for P6 full-color display using D15 huidu card

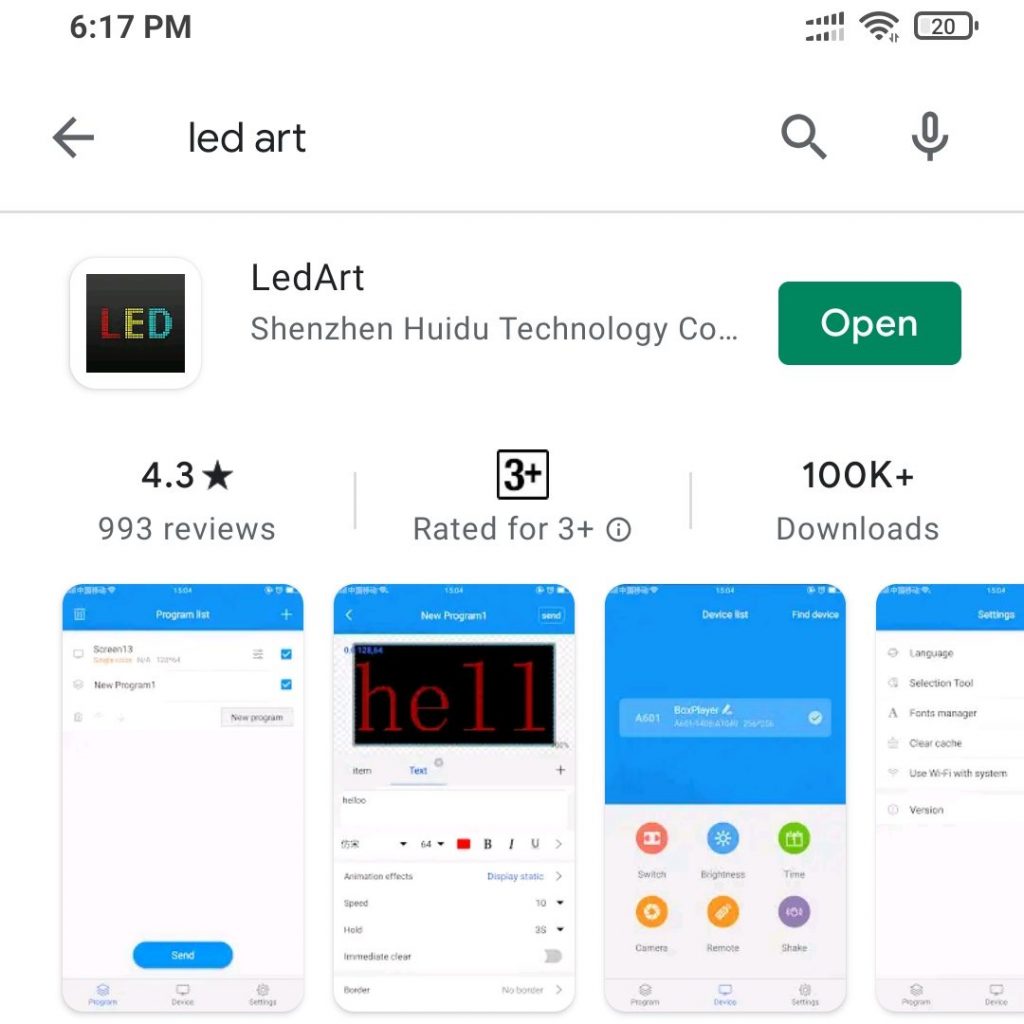
Step1 Download Led Art software from playstore.

1619009287874 1 edited 1

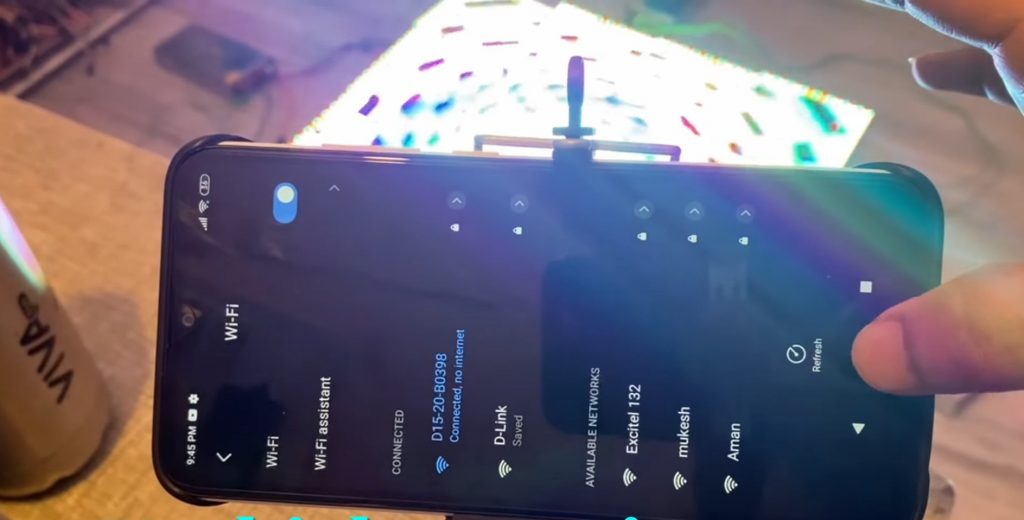
Step 2 Then go to the wi-fi and connect the wi-fi. Name of wi-fi is D15-20-B0398. After that enter the password ie..88888888 then, click on connect. We see that wi-fi is connected.

1619165928786

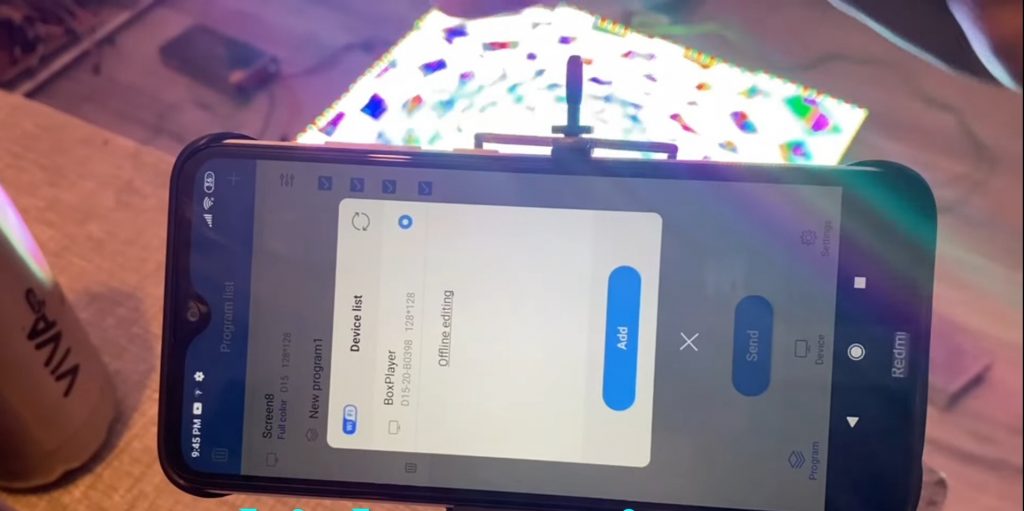
Step 3 Open the Led Art app. After that create a display. On the screen we see the card name Box Player or you can change the name according to you, then press add button.

1619165928794

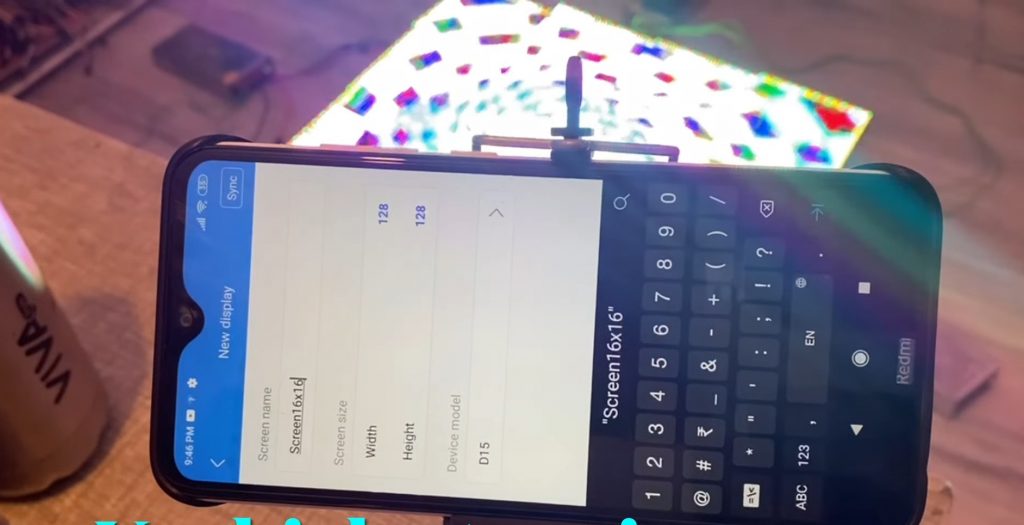
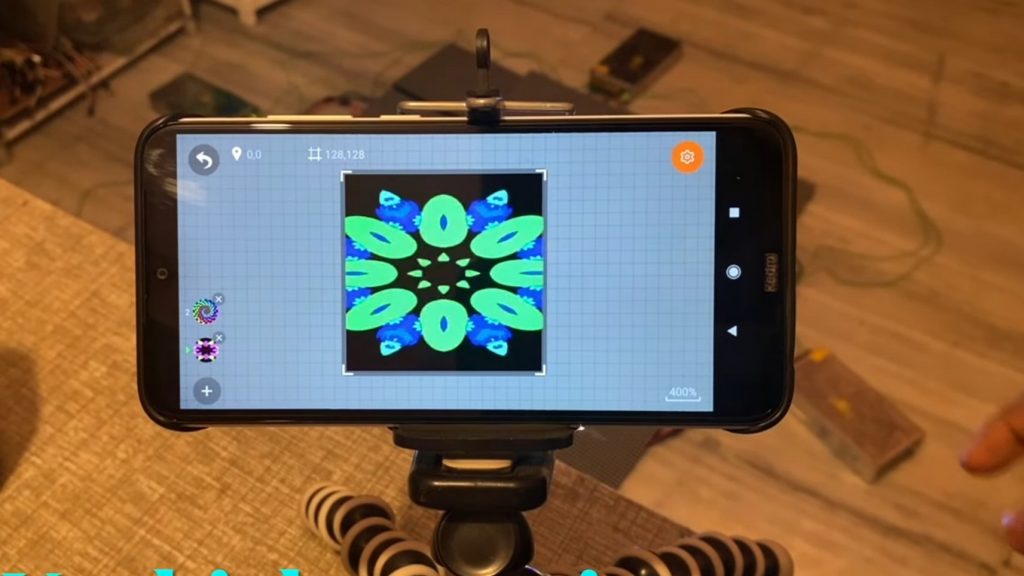
Step 4 After that next screen is open. Here you enter screen name according to you ex- Screen 16*16,then set screen width etc. as shown below. What we have in width is in one tile we have 32 matrix which means the width has become 32*30.So we have 4 tiles in length, the width is 32*4=128 and height is 128.Then press OK.

1619165928796

Step 5 Display is shown on the screen. After display shown on screen press the add button. After that we can enter text, images, video etc. so many varieties are available here you can run any of them. For ex- We want to run text ,so what we have to do is we click on text option after that text screen is open. In screen we enter the text which we want to display on the board like Welcome All. In this, we can also run each text with different colours. We can also change the font size of text and so many things. Then press OK.
1619165928801

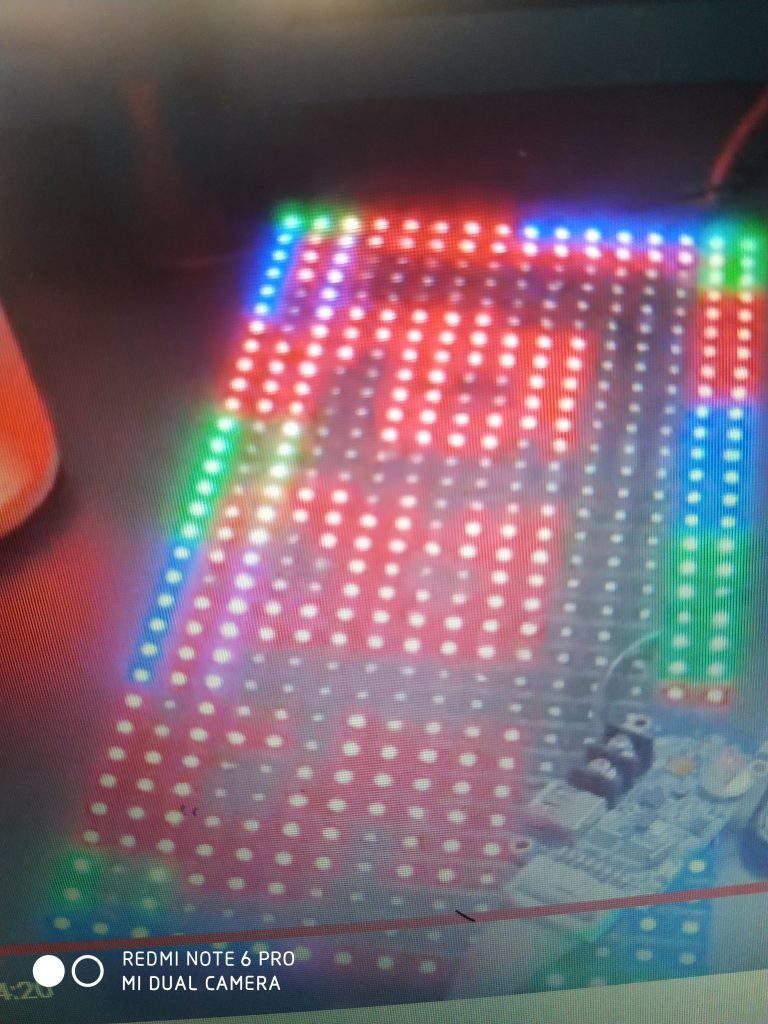
Step 6 After setting all things according to you ,you can click on send button. The display is like this.

1619167408189

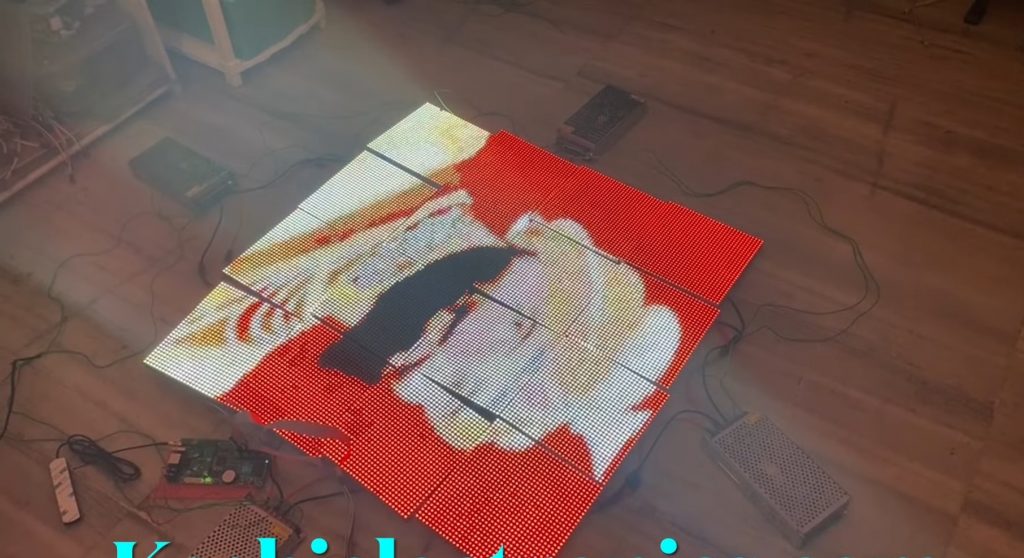
Step 7 If you have to set the background, you have to firstly click on add then click on animated words then go to effect then select effect and press send. If you want to add more effects on this you can program this on computer and feed program through USB.

1619165928848 1

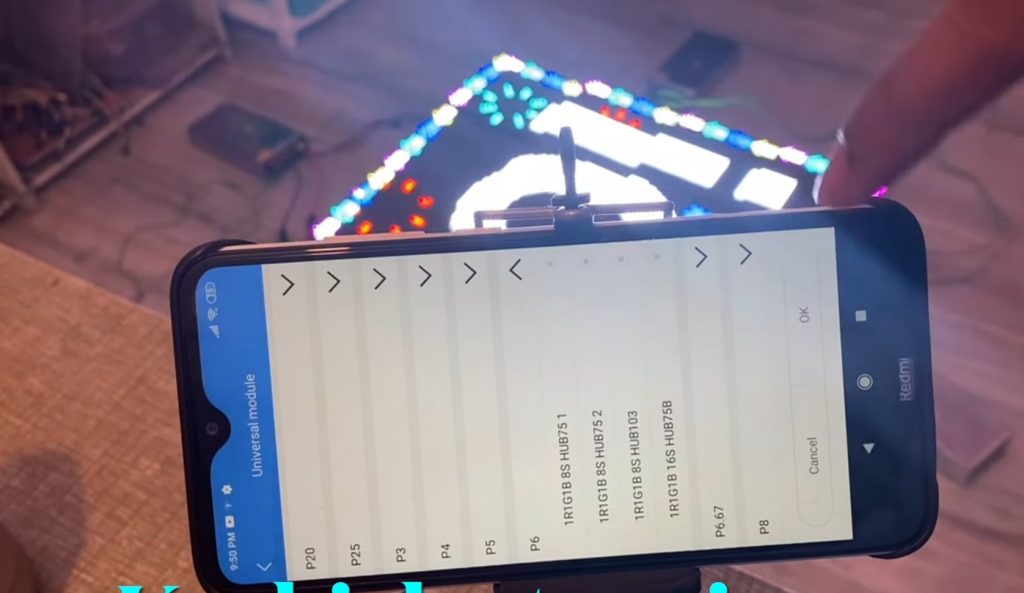
Step 8 If you found that text is not running properly so what you have to do is go to device then hardware then enter password ie..888,then select your perfect IC number. Click on universal module, you should know which is your module. After that select your module then click OK. By doing this your display is running properly.

1619165928850 1

Step 9 Now we run image on the board. Press on add button then go to image, there is a point on side firstly click on that button then click on send button.

1619165928853

Step 10 Now we run the video on the board. Again press on add then go to video then select the video which you want to display then click on send button.

1619165928855

Step 11 Now we run clock on the board. Same step is followed as told above but here we select clock. Here we see that there is a two type of clock .You can select any clock you want to run. Select things what to display in the clock like date, weeks, intervals etc. then press on send.

1619165928857

Step 12 If you want to display name on clock then click on clock then go to settings select title, enter your text the press ok. Move back then press on send button.

1619165928858

Video -P6 full-color display using D15 huidu card

P10 single color (W0) Wi-Fi controller

hd wo

Hello, friends welcome to my blog. In this blog, we learn about

P10 single color (W0) Wi-Fi controller

Parts required:

  1. W0 card controller
  2. Power supply 5V
  3. Connectors and FRC
  4. 32*3 P10 led display module-1

Wiring ofP10 single color (W0) Wi-Fi controller

How to use P10 single colour (W0) Wi-Fi controller

Software

download – App

1618995706827 233x300 1
Steps to connect display with Led Art app:

Step 1 Power the controller

Step 2 Download Led Art software from playstore

1619009287874 1 edited 1

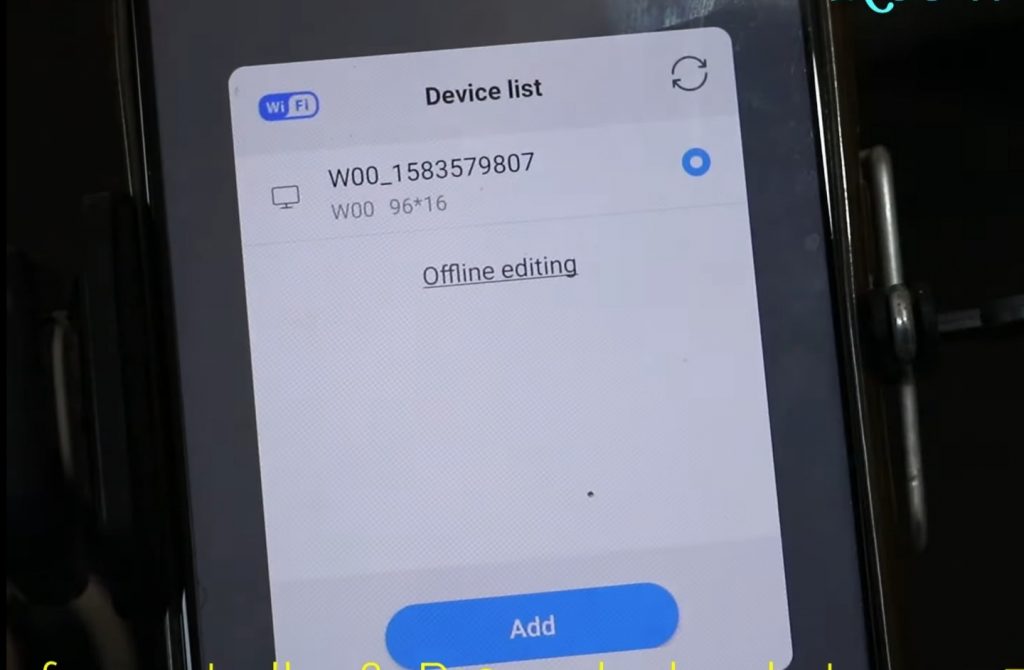
Step 3 Firstly turn off the power supply for a sec and then turn on.After go to the wi-fi andconnect the wi-fi.NaMe of wi-fi is W00_1583579807.In case this name is not shown what you have to do is again turn off the supply for a while and the on the supply.With this ,our wi-fi name is going to be a show.After that enter the password ie..88888888 then,click on connect .We see that wi-fi is connected.

1619080791426

Step 4 Open the Led Art app.After that create a display.On the screen we see the card name W00_1583579807,then press add button.

1619080344897

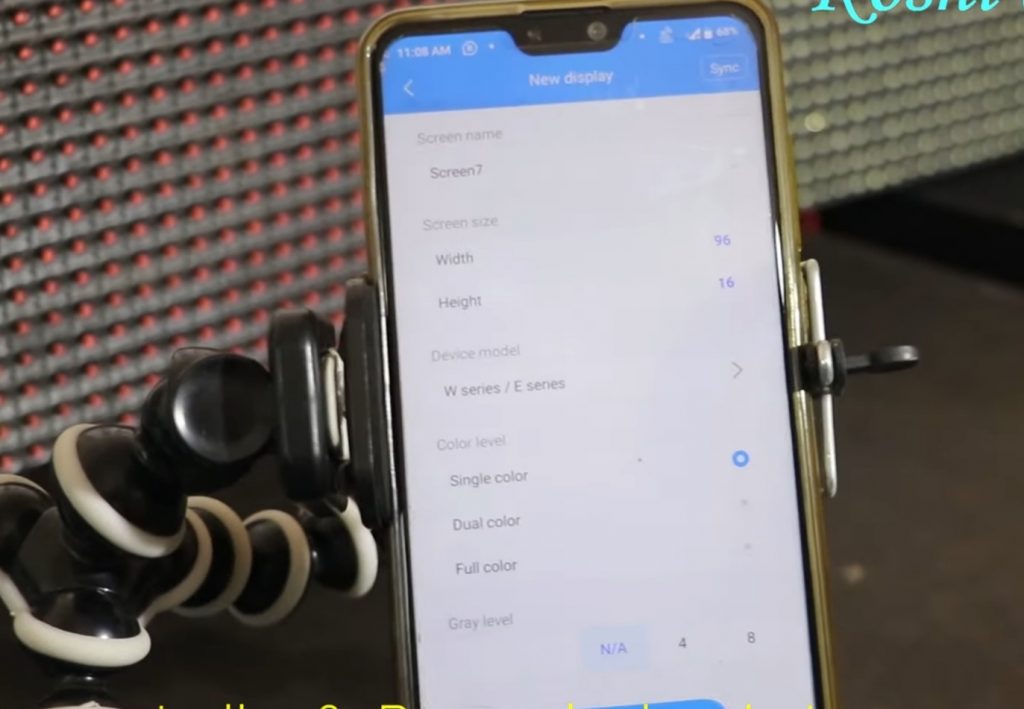
Step 5 After that make the settings,we have 3 tiles .How to calculate 96, the size of matrix of one tile,height has 16 led and in width there is 32 leds.So we have three tiles so how to calculate is 32*3=96.Select width 96 ,height 16 ,device name W series etc you can select accordingly then press OK.

1619080344907

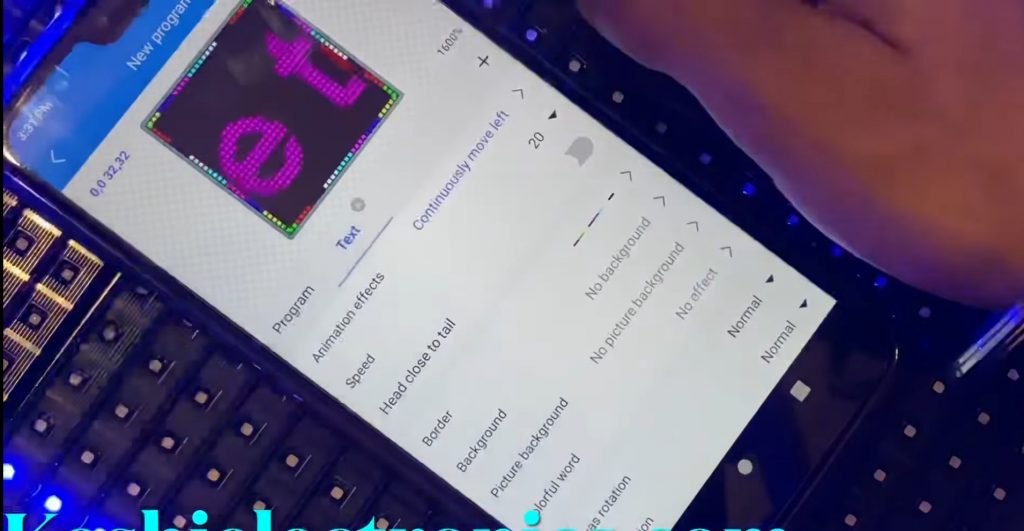
Step 6 Next display is open.Here we enter the text whatever you want to display on the board.Here we see that display is moving very slowly,for this we click on display statics then click on continuous move left then click on send button to check how the text is moving.

1619080344916

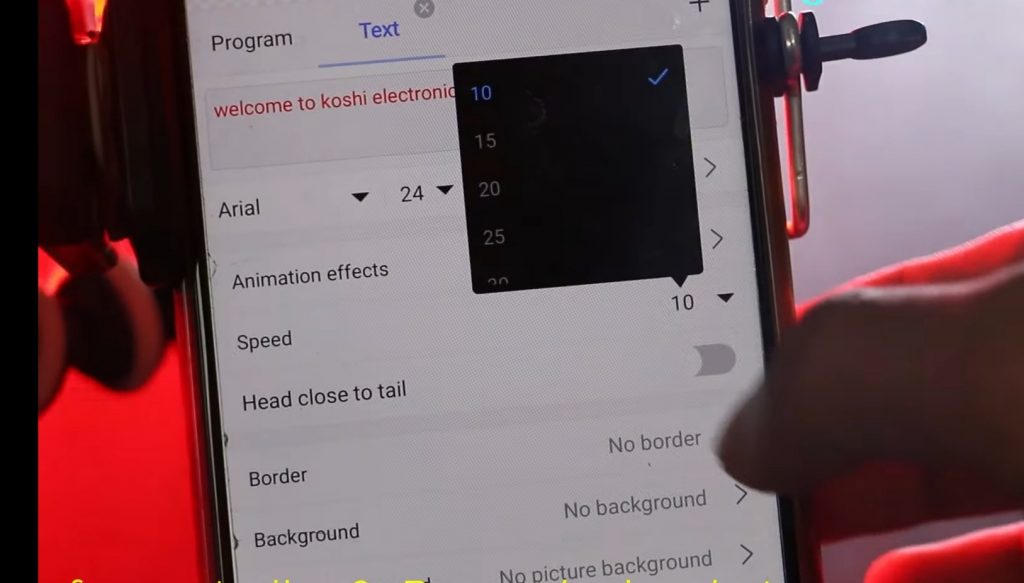
Step 7 We see that text is moving fastly,we click on return button then we see the speed option,we set our speed 20.To bold the text click on B.After that click on send button.

1619081105188

Step 8 Now we set the border.Go to border option.According to you, you can select the border whether you want one line border or two line border then click on send .

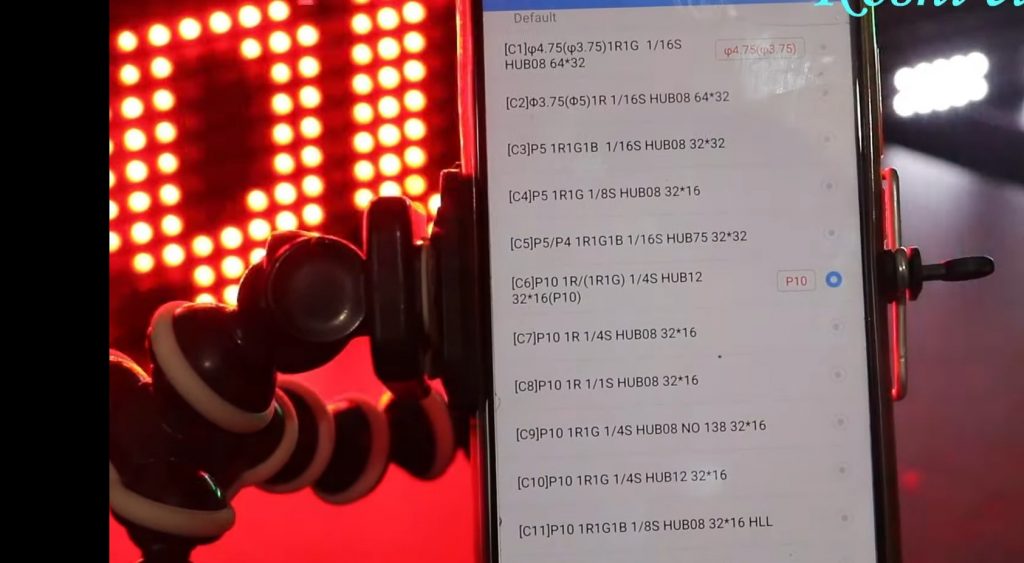
Step 9 The tile of a lot of people will run upside down so what we have to do is go to device option then hardware then enter the password ie..888.This is called scanning mode.We see the list of P10,click on P10 16*32 then press send.According to you,you can select this.

1619080344934

Step 10 What will I do if I want to drive a clock on it.Go to program after that we will reduce the size of new program we create.Lets run a number before the clock ,go to program,click on plus sign,click on add text.We had a number in the space which we had saved like 12345 then press send.

1619081716226

Step 11 Now we run clock ist delete the number then again go to program then add clock.Here we see two types of clock you can select clock of your choice then click on send.In this way you can run your display.

1619080344937

Video Tutorial – P10 single color (W0) Wi-Fi controller

How to reset huidu controller password

1619005077756

Hello, friends welcome to my blog in this blog we learn about how to reset huidu controller password.

Software –

download – App

1619009287874 1 edited

Problem :

When we buy the display from somewhere with a default password set in it. This password is either set by the company or set by where you buy this.

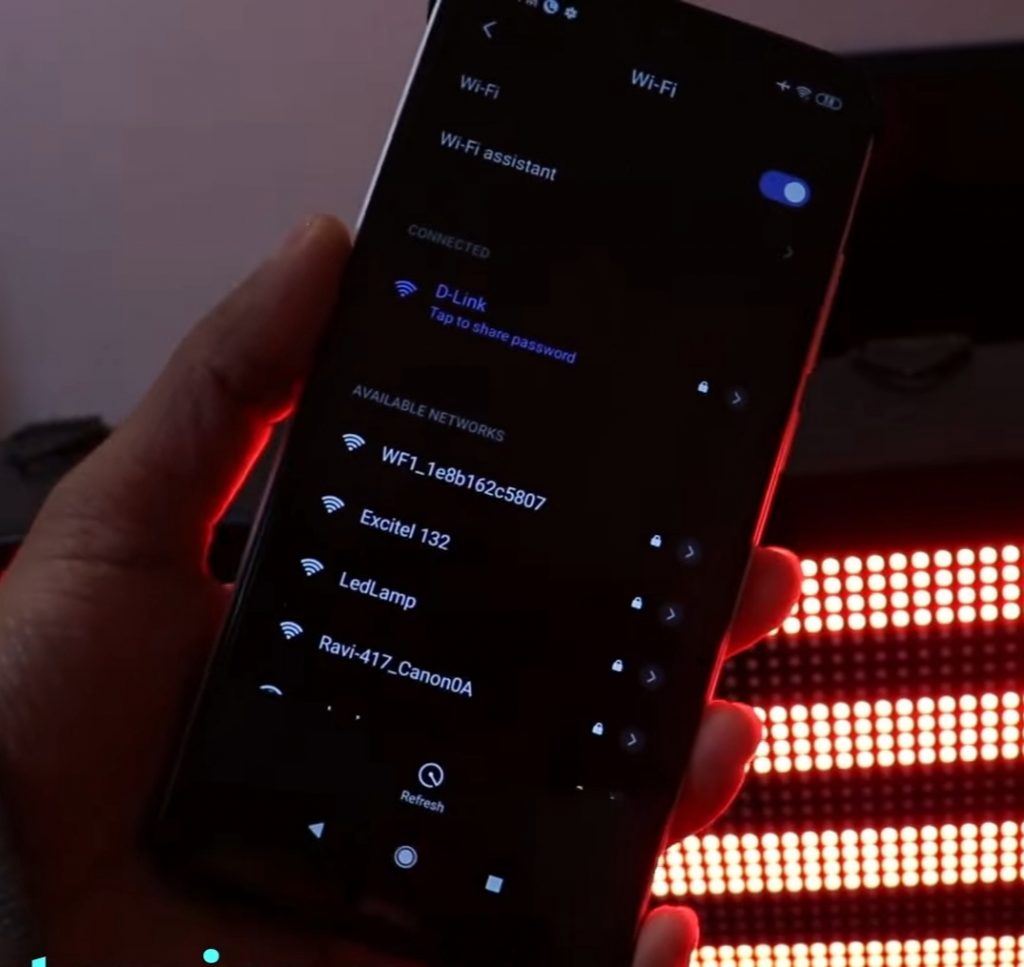
Before opening the Led Art app we can first open the wi-fi. After open the wi-fi we see an available wi-fi network.We select WF-1e8B162c5807.

After that, we enter the password ie..88888888.This is the default password that is set by the company.

If the password is matched then it is correct or if not matched that’s means there is some error in it.

So we can reset the display by following the below steps.

Steps to be followed to reset the password :

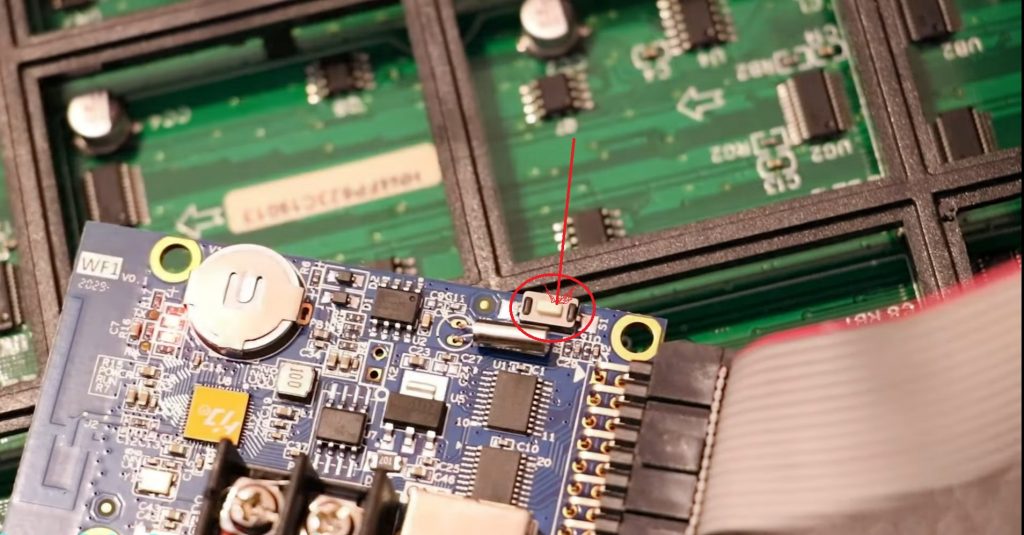
Step 1 Open the back panel of the display. As we see that there is a power supply,3 modules, and a card connected in this panel. Here we can only reset is WF-1 which comes for RGB controller.

1619005077773

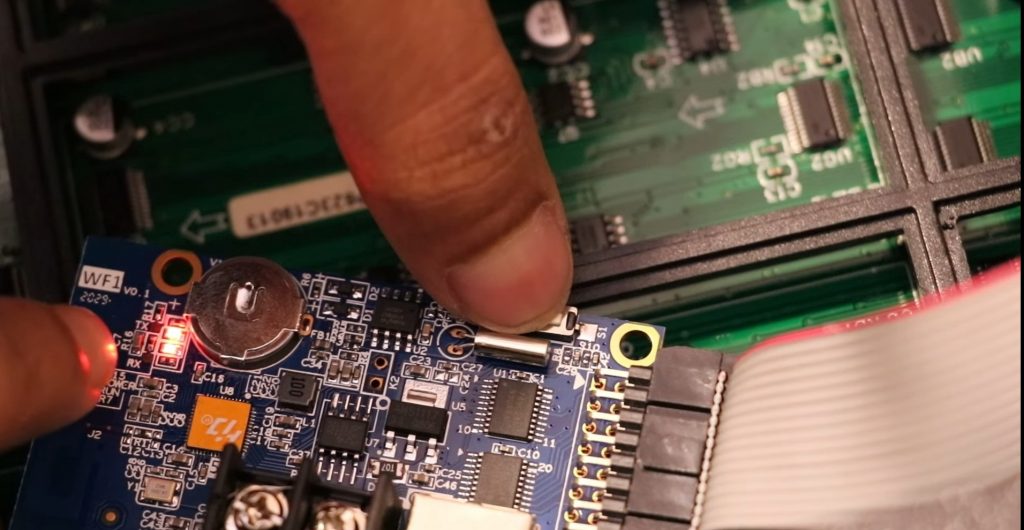
Step 2 On the WF-1 controller there is a button given on the controller named “Test Button”.

1619005077756
How to reset huidu controller password

Step 3 Cut off the power to turn off the LED glowing on the controller.

Step 4 Press and hold the test button and turn on the power.

How to reset huidu controller password

Step 5 Wait for 20 sec and you will see that the LED will blink faster.

Step 6 Leave the test button after you see the led blinking faster.

Step 7 After this your display will show these dotted lines.

Step 8 Firstly connect your wi-fi. The wi-fi name shown on the screen is WF-1e8B162c5807. After that enter the default password ie..88888888.Now go to the mobile app

1619005077766

Step 9 Feed the text and then press on send button which is given on the top right-most on the screen. But before sending, go to the app settings and add a device on the mobile app.

images

Step 10 Select the device and then send it. Now you can see that your display is ready.

1619005077769 1

How to reset huidu controller password video tutorial

This method is applicable for different types of huidu controller

How to use WF-1 P10 RGB Controller

How to use WF-1 P10 RGB Controller

How to use WF-1 P10 RGB Controller 

Hello friends welcome to my blog in this blog we learn about how to use WF-1 controller by  android app

Parts required :

I used the following parts in this project :
  1. Power supply –https://amzn.to/3vCtUh8
  2. HUIDU HD-WF1  controller – https://amzn.to/3b0Obou
  3. P10 RGB LED module –https://amzn.to/3nHE3pM

Application software LED Art

 Download  App

Steps to use this controller :

Step 1 – Take RGB board.After that connect the controller to the RGB tile with the help of FRC Cable and then connect board to the power supply with the help of cable .For the supply we have two cables with positive and negative pins which we have to connected on the power supply.It can operate on 5V.

How to use WF-1 P10 RGB Controller
P10

Step 2 Turn off your mobile data then open wi-fi and connect it to your controller. The Wi-Fi name is WF-1 and after that, we enter the password eight times we press 8 then click connect.

 Open the Led Art App on your mobile phone.

1618995706827

Step 3 – After opening the app go to the new program we see some details like controller name, the board size, etc. Without any changes we press OK. After that, we see the text on the screen, whatever changes we want to change like text font, animation, speed of text, etc we can change our accordingly.

screen 1

Then we press send button. We see that text is running on the board. We you found that on board text is not moving properly or text is moving upside down as shown in picture.

1618993896148 1

Step 4 – If this type of problem occurred go to the device then select hardware. After that press three times 8 as a password.

750x750bb 1

Step 5 – A list is open on the screen we can see here the different types of P10. According to the IC number, we can select this. We can search C77 then select it, then proceed. After that, we can see the text is moving properly. Here we can select multicolor text also. In this way, we can use our WF-1 controller.

1618996101417


https://youtu.be/j_4vH6YK-WQ
Share on facebook
Share on twitter
Share on linkedin
Share on email
Share on whatsapp
Share on telegram
Share on pinterest